Category Archives: Uncategorized

Honey and spice cookies

Last weekend I attempted my first recipe from Rachel Allens ‘Bake’ cookbook. Ginger and honey snaps…

They were unbelievably easy to make. You just need…

225g self-raising flour

2 tsp bicarbonate of soda

Pinch of salt

1 tsp ground ginger

1 tsp mixed spice

½ tsp ground cinnamon

100g caster sugar, plus 1 tbsp extra for sprinkling

125g butter, cubed

100g runny honey

Preheat the oven to 180 degrees and line a couple of baking trays with greaseproof paper.

Sift the flour, bicarbonate of soda, salt and spices into a large bowl with the 100g of caster sugar and mix together well.

Rub the cubes of butter into the dry ingredients with your fingertips until it has the texture of breadcrumbs.

Heat the honey gently in a saucepan before adding to the other ingredients and using a wooden spoon bring the whole lot together into a smooth dough.

Sprinkle the tablespoon of caster sugar onto a plate and using your hands take a small amount of the cookie dough, roll it into a ball and then roll it around in the sugar before popping it onto the prepared tray, making sure they are about 2 inches apart from each other. To give you an idea of the size that your balls need to be…the recipe should make about 20 cookies. Finally use the back of a fork, dampened slightly, to flatten down each of your cookies before baking them in the oven for 10-12 minutes or until they are medium brown. This is where you need to keep a watchful eye on them and use your judgement because Rachel says that if you let them get too dark they’ll taste bitter…and what Rachel says…goes!

Once you’re happy that they’re the correct shade of brown, take them out of the oven and let them cool on the tray for a few minutes before transferring them onto a wire rack.

Mine didn’t get that far before me and my housemate were doing a taste test with a cuppa…


They get the thumbs up from me, apart from the fact that I would definitely class them as a cookie and not a ‘snap’, as Rachel billed them, due to their melt in the middle texture. However maybe I was just too hasty in taking them out of the oven…that’s just the way the cookie crumbles…or doesn’t in this case 🙂

Leave a comment

Filed under Uncategorized

Banana and pecan fudge loaf…

What do you get if you cross a deliciously moist banana bread recipe with a bag of chewy toffees?…a gooey, moist banana and pecan fudge loaf…that’s what!…

I was drawn to this delicious sounding recipe whilst flicking through my ‘Good Food 101 Teatime treats’ book, a veritable goldmine of baking porn.

To make it you’ll need…

150g chewy toffees (recipe called for Werther’s Original chewy toffees but I just used Sainsburys own brand)

2 ripe bananas, mashed (about 200g peeled weight)

2 eggs, beaten

100g butter, melted

100g toffee yoghurt

100g light muscovado sugar

200g self-raising flour

½ tsp baking powder

100g pecan halves, roughly chopped

Preheat the oven to 160 degrees and line a 2lb loaf tin or if you’re lucky like me and have a little silicone number then just get it out of the cupboard in readiness.

Chop the toffees into small chunks. The recipe suggested using wetted scissors but as these are another thing that I need to add to my kitchen essentials shopping list, I just used a sharp knife to chop my toffee, with only a few floor casualties.

Mix the bananas, eggs, butter, toffee yoghurt and sugar together well.

Sift the flour and baking powder into the bowl and fold in. Add ¾ of the pecan nuts and ½ the chopped toffees and stir before piling the mixture into the tin. Finally sprinkle over the remaining nuts and toffee…so wrong it’s right…

Pop in the oven for 50-55 minutes. I highly recommend standing your loaf tin on a baking tray as this cake has a tendency to erupt everywhere et voila…

Although my loaf had risen perfectly and was springy I found it quite difficult to decide whether it was totally ready due to the vast amount of volcanic toffee pockets throughout! I stuck to 55 minutes and it was cooked but extremely moist inside and would maybe have benefited from a couple more minutes.

Once out of the oven you have to withstand the torture of letting it cool in the tin before you’re allowed to have a taste. It made my whole house smell divine and drew a steady stream of housemates to the kitchen in search of tasty treats…

Owing to the moistness of the loaf it wasn’t the easiest of cakes to cut neatly but to be honest I don’t think anyone minded as it was demolished pretty promptly. I think it was always going to be a winner…I’m already a big fan of banana bread but have never in my life added toffees to a cake…but there’s a first time for everything and now I fear there is no going back!

I think photo’s, however rudimentary, say it all…

Leave a comment

Filed under Uncategorized

Upheaval & an orange and white chocolate sponge…

This weekend I underwent the upheaval of moving house. It wasn’t until I started packing my kitchen paraphernalia into boxes, that I realised just how much ‘stuff’ I’ve amassed in the last few years. My siblings looked on in horror as they realised the mammoth task they’d volunteered themselves for in the name of family support and loyalty 🙂 My sister was particularly perplexed when she came across the 4 bags full of empty jam jars that I’d had stashed under my bed. “Why on earth do you need so many jam jars?”, she asked, to which I reasoned that I never knew when the urge to make some jam or chutney may strike and if there were no jars to hand when that time arose, I’d be seething! I somehow managed to win that battle and as a result am still trying to find a jam jar shaped space for them in my new home…I’m just going to have to get preserving!

I’m not a big fan of moving house as it leaves me feeling all out of sorts. However, I seem to have developed a good coping mechanism…to abandon the unpacking of my room, to get the KitchenAid mixer out and get baking. After all, I had to check the oven was fit for purpose…right?

So I set about making an orange and white chocolate sponge…

I followed a recipe from  my BBC Good Food ‘101 teatime treats’ book.

To make this delicious light and delicately fruity sponge with a creamy but tangy topping you need…

175g butter, softened

175g golden caster sugar

Zest of 4 oranges and juice of 1

4 eggs, separated

100g self-raising flour

1 tsp baking powder

100g ground almonds

Preheat the oven to 180 degrees and line 2 x 8 inch (20cm) cake tins with greaseproof paper.

Beat the sugar with the butter and orange zest until light and fluffy. Then beat the egg yolks into the mix. Sift in the flour and baking powder and fold in gently. The mixture will look a bit stiff but panic not, just fold in the orange juice and the ground almonds and set aside. In a separate bowl, whisk the egg whites until they hold their shape. Finally fold the fluffy egg whites into the rest of your cake batter. Handle with care so that you retain as much air in your batter as possible thus producing a perfectly, light sponge cake!

Divide the mixture between the cake tins, level the top and pop in the oven for about 30 minutes. I checked mine after just 25, which was sufficient for my new oven, whose performance I was monitoring closely. Your cakes should be golden brown and spring back when pressed gently on top. To be sure, you can insert a skewer into the middle and if it comes out clean it’s ready.

Leave them to cool in their tins for a few minutes before transferring onto a wire rack to cool completely.

For the icing you need…

200g white chocolate

200ml crème fraiche

Chocolate curls to serve (optional) 

I made my chocolate curls by using a vegetable peeler to gently shave the side of one of my bars of chocolate before I melted it (obviously). The chocolate needs to be room temperature for this to work. Once you’ve managed to produce a few chocolate shavings, pop them on a plate in the fridge so that they retain their shape and don’t end up as a sorry melted mess before you’ve managed to get them atop your sponge.

The recipe said to melt the chocolate in a bowl over a saucepan of simmering water, which is how I would usually do it, however, I realised that amongst my ridiculous amount of kitchen equipment, I don’t have a bowl of the correct size for this job (*must add to kitchen essentials shopping list) so I used the microwave (eek!) if you too are lacking in the bowl department and need to use the microwave then just take it easy…zap it for 15-20 second bursts, removing it at each interval to give it a good stir. Once it’s all melted, set it aside to cool.

Whip the crème fraiche until thick before folding in the chocolate. Use some of this divine mixture to sandwich your cakes together. Then spread the remainder generously over the top. Now test your willpower and put it in the fridge for at least an hour to chill before topping it with your chocolate curls and tucking in!

I think I’m going to need a bit more practice to properly acquaint myself with my new oven (what a shame ;))…my first attempt turned out pretty well but I wrote this blog whilst watching the Great British Bake Off final…and delicious as it was I’m not sure it’d stand the Mary Berry test!

Leave a comment

Filed under Uncategorized

A Union of coffee & competition…

My coffee addiction reached new heights last weekend when I spent a very enjoyable day at Union Hand Roasted Coffee HQ with a gaggle of lovely food and drink bloggers. My interest had been well and truly piqued earlier in the week at the mention of a competition…we’d been tasked with bringing along an item of food that we felt would best be enjoyed with coffee. I had just thing in mind and spent Friday night baking away in preparation…but more of that later.

Union have a great little set up in West Ham…a roastery, training centre and tasting room…a veritable hub of coffee connoisseurship!

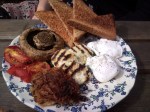
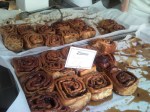
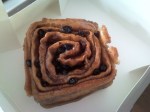
We were welcomed with a cup of their La Esperanza and some delicious pastries from Gails before splitting into groups. My group were taken into the training room and let loose on the coffee machines! I was so unbelievably excited to be given the opportunity to play with a La Marzocco, my dream machine!

Helena shared her wealth of coffee knowledge with us…

Explaining everything from the importance of maintaining and cleaning the hopper…

to exactly how to hold the tamper and the exact pressure to exert in order to produce the perfect extraction…

We were using their Revelation blend, which is very deep, dark and rich. First off we extracted it for 22 secs…

then a not very successful 13 secs…

and finally 21 secs, which produced the perfect espresso with just the right balance of acidity to get the juices flowing without leaving a bitter aftertaste!…

We all had a go at producing the perfect espresso before moving onto the milk steaming masterclass…

Steamed milk should be shiny, thick and velvety NOT empty, Mr Whippy style foam that some high street coffee shops try and palm you off with! The trick is to get the milk spinning evenly and then to gradually introduce a bit of air into it by letting the steam wand just peek above the surface…

You can gauge when the milk is ready by sight, sound (there shouldn’t be any torturous high pitched squealing) and touch (you should always be able to touch the bottom of the jug). Once it’s ready you tap the jug on the worktop to get rid of any excess surface bubbles and finally swill it round to ‘polish’ it. The finished product should coat the back of a spoon luxuriously like so…

Then you can use it to turn your perfect espresso into the perfect coffee. Believe it or not, with a little help from my friend Helena, I managed to create this beautiful cappuccino…

One of the things I love about Union, is that although they are growing in popularity and are even stocked in Sainsbury’s, they are still very grounded (pun fully intended!). The co-founders, Jeremy and Steven, are inspiringly passionate about coffee and devote much of their lives to researching, sourcing and tasting to ensure that Union produce the finest coffee possible! This is Jeremy in a hat that he brought back from one of his sourcing trips, it also happened to be the star prize in the barista championship smack down, which took place later in the day…

After lunch we were taken on a tour of the roastery, an Aladdin’s cave of sack upon sack of coffee bean varieties from all over the world…

They have 2 main roasters…the big daddy, which can roast 90kg per batch…

and the little ‘San Franciscan’ drum roaster, which roasts batches of 10kg…

Steven talked us through the roasting process…

He dipped into the roaster at intervals to check on the beans progress (spot the bloggers)…

It took approximately 13 minutes for the green coffee beans to go through these stages…

and to eventually be turned into the finished beans that can be used to make a cup of coffee…

Steven made it all look very easy, although the reality of coffee roasting is apparently very hot, messy, sweaty and physical.

We all strained to listen for the ‘first crack’, which would tell us that the beans were ready, at which point Steven released them from the drum onto the cooling tray to halt the roasting process…

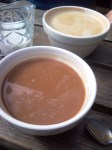
We were then led through to the tasting room for a lesson in ‘cupping’. It all felt very serious. We were presented with 5 varieties of coffee from Costa Rica, which had been ground, put in glasses and covered up to stop the aromas escaping before we could get a whiff…

The first stage was to unleash those aromas and to smell the ground coffee using short ‘dog like’ sniffs.

Then hot water was poured over them…

Jeremy showed us how to use a spoon to break through the crust of ground coffee to inhale the coffee…

We then skimmed the coffee grounds off and used the spoon to ‘slurp’ the coffee. This bit was the most fun…the noisier the slurping the better! :)…

After all of that coffee inhalation I was feeling pretty giddy and just about ready for a dose of my other vices…cake and competition!

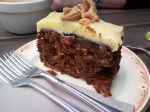
As I mentioned earlier, we’d been asked to bring along something (bought or made) that we thought would be perfect paired with a cup of coffee. Back in April I made a delicious cardamom coffee mud cake, which immediately sprung to mind as a great companion for coffee. So on Friday night I stayed in and baked (rock and roll!) to produce my (hopefully) winning entry…

After a bit of twitter banter and a good dose of healthy competition everyone had really pulled out all the stops to come up with their ideal coffee pairing… 

We had to wait until the very end of the day to discover who had won but it was well worth the wait because I’m extremely chuffed to announce that me and my cardamom coffee mudcake were victorious!!!

Chloe (@Faerietalefoody) was awarded joint 1st prize with her delicious fruit and spice laden biscotti. We are now very proud Union ‘Roastmasters’ and are going to be spoilt rotten by being sent coffee by Union Hand Roasted every month for a whole year…bliss!

As if that wasn’t enough they’ve also given me a special code to share with you so that you can receive 10% off online orders at www.unionroasted.com just shop away to your hearts content and when you get to the checkout enter the discount code ‘AFTERNOON10’.

Many thanks to Jeremy, Steven, Gail, Ari, Helena and Alan for a wonderful day and to Union Hand Roasted Coffee for fuelling my caffeine addiction 🙂

Leave a comment

Filed under Uncategorized

Afternoon Tea for…30!

Yesterday was a big day for me…my first ever afternoon tea catering job! I definitely don’t do things by halves…it was for a whopping 30 people and even though it involved an awful lot of baking and more pats of butter than I’ve ever seen in my life…I was completely in my element and loved every minute! 

In November last year I catered for my friend’s parents Ruby Wedding celebration and I can’t have done too bad a job because they asked me back to make afternoon tea to celebrate a double birthday, my good friend Han’s ‘30th’ and her gorgeous Granny Madge’s 90th…I felt ever so privileged!

I formulated a menu using a selection of my favourite recipes that I’ve tested since starting this blog. After a day and a half of baking, icing, crust removing, buttering, slicing and primping this was the final spread… 

Almond biscotti recipe here with the addition of a few added dried cranberries.

Sticky lime and coconut drizzle loaf recipe here.

Blueberry and soured cream cake recipe here.

Sticky toffee cupcake recipe here.

Chocolate brownie recipe here.

Devonshire scone recipe courtesy of my Mum below.

I took this job very seriously and even researched cucumber sandwiches on t’internet. I discovered that there are many ways to make them but the way I chose was to peel and slice the cucumber then soak it in a mixture of 1/2 cup of white wine vinegar and 1/2 cup of water for about 30 minutes. Before making the sandwiches I drained them well and patted them dry with some kitchen roll. I buttered the bread generously with salted butter, not only because it tastes better but because it acts as a barrier to stop the bread going soggy. And there you have them, and I quote…’The best cucumber sandwich ever’.

Sausage roll recipe here.

I’d been asked to make a veggie alternative to sausage rolls and after trawling the internet I came up with these amazing spinach and sundried tomato puff pastry pinwheels. I found the recipe on a blog site called Recipe Girl here. They were perfect for this event as I was able to make the filling the day before… 

Spread an even layer of it onto a couple of sheets of puff pastry…

roll it up…

wrap it in clingfilm and pop them into the freezer. So all I needed to do on the day was cut them into half inch slices, lay them on a baking tray and bake them at 200 degrees for about 25 minutes, until golden brown. They were so popular and were demolished in a matter of minutes!

One of the last things I baked were the Devonshire scones. I’d been reliably informed by my Mum that they’d be so much better if they were freshly baked on the day! So 7am Saturday morning, saw me making 40 of these beauts… 

I was amazed at how easy they were. To make about 10 small scones you need…

225g self raising flour

40g unsalted butter, at room temperature

150ml milk

1 1/2 level tbsp caster sugar

pinch of salt

Preheat the oven to 220 degrees and line a couple of baking trays with greaseproof paper.

You simply rub the butter into the flour until it looks like fine breadcrumbs. Stir in the sugar and salt. Then with a knife (it might sound weird but go with it, it works!) mix in the milk, a bit at a time until it forms a dough. If it seems a bit sticky, sprinkle in a bit more flour and if it seems a bit dry add a splash more milk. When you’re happy with the consistency, get in there with your hands and without overworking it bring it together into a ball.

Roll it out to about 2cm thick and using a small circular pastry cutter press down firmly to cut out your scones. Even though it’s very tempting to twist it…try not to otherwise you’ll be left with very lopsided scones! Mine did have a bit of a slope to them but I like to think that it gave them character! 🙂 

Finally dust the tops with some more sifted flour…

 and pop them in the oven for 12-15 minutes until they are golden brown…

Then the only thing you need to worry about is whether you’re going to go ‘Cornwall’ (jam first then clotted cream on top) or ‘Devon’ (clotted cream first then jam on top)…this managed to spark a great debate amongst the afternoon tea guests along with whether they were ‘scones’ (rhymes with gone) or ‘scones’ (rhymes with own) 🙂 I personally enjoy my ‘scon’ the Cornwall way every time…how about you?

Leave a comment

Filed under Uncategorized

Another gorgeous trip to The Haberdashery in Crouch End. If you haven’t been there…go! Definitely one of my fave Sunday brunch spots…lounging in their sun trap of a back yard, eating delicious food and supping steaming bowls of strong coffee 🙂

Leave a comment

18/09/2011 · 4:28 pm

They’re not Terry’s…they’re my chocolate orange cupcakes…

If you’re a Terry’s chocolate orange fan, you’ll absolutely love these cupcakes from The Hummingbird Bakery ‘Cake Days’ book…

The added bonus being that you don’t need to battle with the sphere of chocolatey orange goodness to enjoy the taste! Is it just me or is it ridiculously difficult to segment a chocolate orange in a ladylike fashion?

To make your own chocolate orange cupcakes you’ll need…

70g unsalted butter, softened

210g caster sugar

105g soft light brown sugar

2 eggs

1 tsp vanilla extract

1 tbsp finely grated orange zest

255g plain flour

50g cocoa powder

2 tsp baking powder

¼ tsp salt

240ml whole milk

Preheat the oven to 190 degrees and line a cupcake tin (or two) with cupcake cases. This recipe is quite generous, it made me 16 cupcakes.

Using an electric mixer, cream the butter and both sugars together until light and fluffy. Beat in the eggs one by one, followed by the zest and vanilla extract.

Sift the remaining dry ingredients (flour, cocoa powder, baking powder and salt) into the butter and sugar mixture on a slow speed, alternating with the milk until everything is incorporated. Then give it a medium speed whizz until smooth.

Fill the cupcake cases with the cake batter until they are two thirds full, don’t be tempted to overfill them or your cupcakes will end up with an unsightly ‘muffin top’!

Bake them in the oven for about 18 minutes or until the sponge springs back when pressed gently. I always err on the side of undercooking as opposed to overcooking and checked mine after about 15 minutes.

Once you’re happy that they’re cooked, remove them from the oven and leave to cool before frosting. 

For the frosting you need…

600g icing sugar

100g unsalted butter, softened

250g full fat cream cheese

60g cocoa powder

3 tsp finely grated orange zest

The recipe suggested using some candied orange peel, thinly sliced for decoration. Needless to say my local Tesco didn’t stock such a delicacy so I just did without.

Whisk the icing sugar and butter (try popping your butter into the microwave in a bowl for 30 seconds first) in an electric mixer on a slow speed until it has the consistency of coarse sand and there aren’t any big lumps lurking. Add the cream cheese and cocoa powder and turn the speed up to medium, mixing until the frosting is smooth and light. Finally stir in the orange zest by hand.

Smooth the chocolate orange frosting onto your cupcakes with a palette knife and if you were lucky enough to find candied orange peel you can use it to adorn each one. I hope that you’ll agree that they look sufficiently tempting without! 🙂

I didn’t think such a small amount of orange zest would provide such a delicious orangey taste…and as with all Hummingbird Bakery recipes…they are moist, light and deliciously more-ish!…


Leave a comment

Filed under Uncategorized

Make a date for some sticky toffee cupcakes…

I’ve just spent the last few moments in quiet contemplation, savouring my final sticky toffee cupcake. I felt it should have the respect it deserved as one of the tastiest, morsels of deliciousness I’ve ever baked! I fear that I suffer from short term memory loss when it comes to my baking and always seem to pronounce the last thing I baked as the most delicious but in this case I think I might be right, check out these bad boys!…

To make these Hummingbird Bakery sticky toffee cupcakes for yourself you need…

180g pitted and chopped dates

180ml boiling water

80g unsalted butter, softened

150g soft light brown sugar

2 eggs

180g plain flour

1/2 tsp baking powder

1 tsp bicarbonate of soda

1/4 tsp salt

1tsp vanilla extract

Put the chopped dates in a bowl and cover them with the boiling water (it’s advisable to measure the quantity of water and not get carried away with the kettle as I did). Set them aside to soak for about 30 mins while you get on with making the cupcake batter. 

Preheat the oven to 190 degrees and line a muffin tin (or two) with cases. I managed to get 16 cupcakes out of this recipe.

Beat the butter and sugar together with an electric mixer until soft and fluffy. Break the eggs in one at a time and beat until they’re incorporated well. Sift the dry ingredients (flour, baking powder, bicarbonate of soda and salt) into the butter and sugar mixture in a few batches, beating after each addition until you’re left with a smooth batter.

Finally add the vanilla extract to the date mixture and add the whole lot to the cake batter. *Cue a fair bit of expletive muttering as my cupcake mix turned into an extremely runny mess*…but panic not fellow bakers…it was not the disaster I imagined it to be…it just meant that spooning the (runny) mixture into the prepared cases was pretty messy 🙂 Pop them into the oven and bake for 18-20 minutes. Trust me…you won’t be disappointed!

Once they’re ready, leave them to cool before frosting.

For the frosting you need…

160g unsalted butter, softened

500g icing sugar

50ml milk

100g tinned caramel or dulce de leche 

12-16 dates, pitted and chopped to decorate

Using an electric mixer, mix together the icing sugar and butter (I find it a lot easier if I’ve put the butter in the microwave for 30 seconds) until it has the texture of sand.

Gradually add the milk and whack up the speed until you have a light creamy butter icing. 

Finally stir in the caramel, trying not to eat too much of it straight from the tin 🙂

Use a palette knife to generously top your cupcakes with the frosting and finish off with a few pieces of chopped date…

Some of my dates had sunk to the bottom of the cupcakes, which was in no way detrimental to the taste and I think was a result of my slightly over-runny batter. So the moral of this story is…stick to the quantities in the recipe! 🙂

I had a lot of icing left and after asking twitter for advice have put it in a freezer bag in the freezer to use another day. When the time comes I’ve been advised to let it defrost overnight in the fridge and then whisk it up before using.

Shame…I guess that means I’ll have to make another batch very soon!

Leave a comment

Filed under Uncategorized

My first foray into the wonderful world of slow roasted pork belly…

My name is Jo and I’m a pork belly addict! There…I’ve said it! don’t they say that admitting to your addiction is the first step of recovery…in this instance however, maybe I don’t want to recover! If I’m presented with a menu containing a pork belly dish, I get tunnel vision and all the other (probably delicious) dishes pale into insignificance! 

I’ve never attempted cooking pork belly myself…that is until last weekend! I’ve been house sitting for some friends in Cambridge and in my mission for wholesome domesticity I invited my parents and brother over for Sunday dinner and decided to cook them ‘slow-roasted pork belly with the sweetest braised fennel’ a la Jamie Oliver.

I biked over to the market to pick up 2kg of pork belly and was very happy to see that the butcher took on the job of cutting off the pigs nipples for me…I’m not usually squeamish but the though of being presented with the task of lopping off a pigs nipple was a little beyond me! on a more practical note…I also got him to score the skin with a stanley knife before wobbling off home on my bike with very unbalanced handlebars.

To make the slow-roasted pork belly with braised fennel you need…

1 x 2kg pork belly on the bone, preferably free range

2 tbsp fennel seeds

salt and freshly ground black pepper

4 fennel bulbs, cut into sixths

A bunch of thyme

5 cloves of garlic, unpeeled

Olive oil

1 x bottle of white wine

Make sure you’re oven is whacked up to its maximum temperature.

Grind the fennel seeds with 2 tablespoons of sea salt in a pestle and mortar until they are a powder (due to my impatience my powder was still fairly coarse but it didn’t prove detrimental to the finished dish). Rub it into the score lines of your pork belly skin.

Put the fennel bulbs, thyme (just the leaves, not the stalks), garlic, a good slug of olive oil and seasoning into a large baking tray…

Lay your pork belly on top…

Put it into the preheated oven. After just 10 minutes, turn it down to 170 degrees and roast for another hour. Apparently putting it into a mega hot oven for a few minutes and then turning it down to slow roast is the key to amazing crackling!

This is what it looked like after 1 hour…

You then drain off any fat and pour the whole bottle of white wine over the fennel in the baking tray and return it to the oven for another hour…

This is what it looked like after 2 hours…

Now you remove the fennel from the tray, transferring it into another dish to either keep warm or, as I did, reheat later for a few minutes in the oven before serving.

It now goes back into the oven for its final stint. I cooked mine for a further hour a half to ensure the crackling was perfectly crackly!

Here it is in all it’s glory after three and a half mouth watering, crackle inducing, tender making hours…

What a beaut! (even if I do say so myself!)

Jamie recommended leaving it to rest for 10 minutes, which I did but then was so eager to get stuck in that any kind of carving finesse went out the window! I served it with mashed potato, the braised fennel and the deliciously concentrated juices that were left in the baking tray…

I’m not sure my photo’s really do it justice but I can tell you that it was absolutely amazing! My family were impressed and with the exception of the occasional murmur of delectation, were rendered uncharacteristically speechless for a good few minutes! 🙂

I encourage all fellow pork belly lovers out there to give this recipe a go!

I’m actually going to The English Pig, a restaurant entirely dedicated to pork dishes, in a couple of days. I hope to be able to indulge my love of pork belly further…but will it measure up I wonder! 🙂

Leave a comment

Filed under Uncategorized

Today I’m celebrating the resurrection of a Cambridge institutionFitzbillies is (un)officially open!

This morning I hot-footed it down to Trumpington Street to purchase some of their infamous sticky chelsea buns.

Thanks have to got to Tim Hayward and his family for bringing back a much loved place and….doing it so well! mmmm

Leave a comment

20/08/2011 · 12:00 pm