Tag Archives: recipe

Delicate pistachio and rosewater cupcakes…

I stumbled upon a bottle of rosewater in the supermarket the other day (not literally) and bought it on impulse with no idea what I was going to do with it. I scoured my collection of recipe books and found a recipe for pistachio and rosewater cupcakes in my book of 500 cupcakes and muffins.

I felt quite nervous baking with rosewater for the first time and was cautious with quantities as I didn’t want my cupcakes tasting like a bowl of pot pourri. The sponge was very light and the cream cheese and pistachio frosting was delicious but the delicate flowery taste of the rosewater was barely discernible. I’ll definitely be braver and add more next time.

To make these delicate pistachio and rosewater cupcakes you will need…

225g unsalted butter, softened

225g caster sugar

225g self-raising flour

4 eggs

1 tsp rosewater

Preheat the oven to 175 degrees and line a couple of cupcake tins with 18 cupcake cases.

Simply put all of the cupcake ingredients in a bowl and mix together with a handheld electric mixer until it’s smooth and pale.

Spoon the batter into the cupcake cases. They should be approx 2/3 full.

Bake for about 20 minutes until golden. Leave to cool in the tins for a few minutes before moving onto a wire rack to cool completely.

For the icing you need…

200g cream cheese

175g icing sugar

2 tbsp rosewater

3 tbsp chopped pistachios

Use an electric whisk to mix together the icing sugar and cream cheese until smooth and creamy. I recommend sifting your icing sugar to minimise the chances of lumpy icing. Once it’s smooth stir in the rosewater and the chopped pistachios. Dollop a generous amount of icing onto your cooled cupcakes. The presence of the pistachio’s in the icing is a bit of a godsend…you’ve got no chance of creating a lump free, perfectly coiffured cupcake so just pile it on and be done with it! 🙂

Leave a comment

Filed under Uncategorized

Coconut carrot slice…not for cinema consumption!

Unfortunately I am not graced with a pantry like Nigella’s (and that’s not a euphemism). It’s a pretty rare occurrence to be able to bake something using only supplies that are already in the cupboard, without the need for a trip to the shop. However, that’s exactly what happened to me on Friday night, when I decided to take part in National Baking Week and try a new recipe for coconut carrot slice…

The inclusion of grated carrot made it amazingly moist but unlike your typical carrot cake it didn’t have a cream cheese frosting and instead was topped with a crunchy mixture of dessicated coconut, sugar and butter…

To make it you need…

250g unsalted butter

300g light muscovado sugar

1 tsp vanilla extract

3 eggs

200g self-raising flour

50g dessicated coconut

200g carrot, grated

2 tsp ground mixed spice

1/4 tsp salt

Preheat the oven to 160 degrees and line a (20cm x 30cm) tray with greaseproof paper.

Gently melt the butter in a large saucepan and then leave to cool for about 5 minutes before adding the sugar, vanilla and eggs. Beat until smooth with a wooden spoon. Stir in the flour, coconut, carrot, spice and salt. I discovered at the last minute that I didn’t have any mixed spice so I improvised and used 1/4 tsp of ground cinnamon, 1/4 tsp ground ginger, 1/4 tsp ground cloves and a few gratings of nutmeg, which worked perfectly well!

Tip the mix into the prepared tin and bake for 30 minutes. Whilst the cake’s in the oven you need to make the topping with…

85g dessicated coconut

25g light muscovado sugar

25g melted butter

Mix the coconut with the sugar, then add the melted butter and stir together. Smooth this crumbly topping over the cake and pop back in the oven for a further 10 minutes until golden and a skewer inserted into the centre of the cake comes out clean.

Leave it to cool before cutting into about 15 generous slices… 

I love having a few simple traybake recipes up my sleeve and have definitely added this one to my repertoire. My only word of warning is that coconut carrot slice doesn’t make for a very suitable cinema snack! After managing to sneak my contraband cake into the cinema on Saturday, I ended up with a very messy lapful of dessicated coconut and sugar 🙂 Hey ho, I’m sure there are worse things that could’ve happened!

Leave a comment

Filed under Uncategorized

Honey and spice cookies

Last weekend I attempted my first recipe from Rachel Allens ‘Bake’ cookbook. Ginger and honey snaps…

They were unbelievably easy to make. You just need…

225g self-raising flour

2 tsp bicarbonate of soda

Pinch of salt

1 tsp ground ginger

1 tsp mixed spice

½ tsp ground cinnamon

100g caster sugar, plus 1 tbsp extra for sprinkling

125g butter, cubed

100g runny honey

Preheat the oven to 180 degrees and line a couple of baking trays with greaseproof paper.

Sift the flour, bicarbonate of soda, salt and spices into a large bowl with the 100g of caster sugar and mix together well.

Rub the cubes of butter into the dry ingredients with your fingertips until it has the texture of breadcrumbs.

Heat the honey gently in a saucepan before adding to the other ingredients and using a wooden spoon bring the whole lot together into a smooth dough.

Sprinkle the tablespoon of caster sugar onto a plate and using your hands take a small amount of the cookie dough, roll it into a ball and then roll it around in the sugar before popping it onto the prepared tray, making sure they are about 2 inches apart from each other. To give you an idea of the size that your balls need to be…the recipe should make about 20 cookies. Finally use the back of a fork, dampened slightly, to flatten down each of your cookies before baking them in the oven for 10-12 minutes or until they are medium brown. This is where you need to keep a watchful eye on them and use your judgement because Rachel says that if you let them get too dark they’ll taste bitter…and what Rachel says…goes!

Once you’re happy that they’re the correct shade of brown, take them out of the oven and let them cool on the tray for a few minutes before transferring them onto a wire rack.

Mine didn’t get that far before me and my housemate were doing a taste test with a cuppa…


They get the thumbs up from me, apart from the fact that I would definitely class them as a cookie and not a ‘snap’, as Rachel billed them, due to their melt in the middle texture. However maybe I was just too hasty in taking them out of the oven…that’s just the way the cookie crumbles…or doesn’t in this case 🙂

Leave a comment

Filed under Uncategorized

Banana and pecan fudge loaf…

What do you get if you cross a deliciously moist banana bread recipe with a bag of chewy toffees?…a gooey, moist banana and pecan fudge loaf…that’s what!…

I was drawn to this delicious sounding recipe whilst flicking through my ‘Good Food 101 Teatime treats’ book, a veritable goldmine of baking porn.

To make it you’ll need…

150g chewy toffees (recipe called for Werther’s Original chewy toffees but I just used Sainsburys own brand)

2 ripe bananas, mashed (about 200g peeled weight)

2 eggs, beaten

100g butter, melted

100g toffee yoghurt

100g light muscovado sugar

200g self-raising flour

½ tsp baking powder

100g pecan halves, roughly chopped

Preheat the oven to 160 degrees and line a 2lb loaf tin or if you’re lucky like me and have a little silicone number then just get it out of the cupboard in readiness.

Chop the toffees into small chunks. The recipe suggested using wetted scissors but as these are another thing that I need to add to my kitchen essentials shopping list, I just used a sharp knife to chop my toffee, with only a few floor casualties.

Mix the bananas, eggs, butter, toffee yoghurt and sugar together well.

Sift the flour and baking powder into the bowl and fold in. Add ¾ of the pecan nuts and ½ the chopped toffees and stir before piling the mixture into the tin. Finally sprinkle over the remaining nuts and toffee…so wrong it’s right…

Pop in the oven for 50-55 minutes. I highly recommend standing your loaf tin on a baking tray as this cake has a tendency to erupt everywhere et voila…

Although my loaf had risen perfectly and was springy I found it quite difficult to decide whether it was totally ready due to the vast amount of volcanic toffee pockets throughout! I stuck to 55 minutes and it was cooked but extremely moist inside and would maybe have benefited from a couple more minutes.

Once out of the oven you have to withstand the torture of letting it cool in the tin before you’re allowed to have a taste. It made my whole house smell divine and drew a steady stream of housemates to the kitchen in search of tasty treats…

Owing to the moistness of the loaf it wasn’t the easiest of cakes to cut neatly but to be honest I don’t think anyone minded as it was demolished pretty promptly. I think it was always going to be a winner…I’m already a big fan of banana bread but have never in my life added toffees to a cake…but there’s a first time for everything and now I fear there is no going back!

I think photo’s, however rudimentary, say it all…

Leave a comment

Filed under Uncategorized

Upheaval & an orange and white chocolate sponge…

This weekend I underwent the upheaval of moving house. It wasn’t until I started packing my kitchen paraphernalia into boxes, that I realised just how much ‘stuff’ I’ve amassed in the last few years. My siblings looked on in horror as they realised the mammoth task they’d volunteered themselves for in the name of family support and loyalty 🙂 My sister was particularly perplexed when she came across the 4 bags full of empty jam jars that I’d had stashed under my bed. “Why on earth do you need so many jam jars?”, she asked, to which I reasoned that I never knew when the urge to make some jam or chutney may strike and if there were no jars to hand when that time arose, I’d be seething! I somehow managed to win that battle and as a result am still trying to find a jam jar shaped space for them in my new home…I’m just going to have to get preserving!

I’m not a big fan of moving house as it leaves me feeling all out of sorts. However, I seem to have developed a good coping mechanism…to abandon the unpacking of my room, to get the KitchenAid mixer out and get baking. After all, I had to check the oven was fit for purpose…right?

So I set about making an orange and white chocolate sponge…

I followed a recipe from  my BBC Good Food ‘101 teatime treats’ book.

To make this delicious light and delicately fruity sponge with a creamy but tangy topping you need…

175g butter, softened

175g golden caster sugar

Zest of 4 oranges and juice of 1

4 eggs, separated

100g self-raising flour

1 tsp baking powder

100g ground almonds

Preheat the oven to 180 degrees and line 2 x 8 inch (20cm) cake tins with greaseproof paper.

Beat the sugar with the butter and orange zest until light and fluffy. Then beat the egg yolks into the mix. Sift in the flour and baking powder and fold in gently. The mixture will look a bit stiff but panic not, just fold in the orange juice and the ground almonds and set aside. In a separate bowl, whisk the egg whites until they hold their shape. Finally fold the fluffy egg whites into the rest of your cake batter. Handle with care so that you retain as much air in your batter as possible thus producing a perfectly, light sponge cake!

Divide the mixture between the cake tins, level the top and pop in the oven for about 30 minutes. I checked mine after just 25, which was sufficient for my new oven, whose performance I was monitoring closely. Your cakes should be golden brown and spring back when pressed gently on top. To be sure, you can insert a skewer into the middle and if it comes out clean it’s ready.

Leave them to cool in their tins for a few minutes before transferring onto a wire rack to cool completely.

For the icing you need…

200g white chocolate

200ml crème fraiche

Chocolate curls to serve (optional) 

I made my chocolate curls by using a vegetable peeler to gently shave the side of one of my bars of chocolate before I melted it (obviously). The chocolate needs to be room temperature for this to work. Once you’ve managed to produce a few chocolate shavings, pop them on a plate in the fridge so that they retain their shape and don’t end up as a sorry melted mess before you’ve managed to get them atop your sponge.

The recipe said to melt the chocolate in a bowl over a saucepan of simmering water, which is how I would usually do it, however, I realised that amongst my ridiculous amount of kitchen equipment, I don’t have a bowl of the correct size for this job (*must add to kitchen essentials shopping list) so I used the microwave (eek!) if you too are lacking in the bowl department and need to use the microwave then just take it easy…zap it for 15-20 second bursts, removing it at each interval to give it a good stir. Once it’s all melted, set it aside to cool.

Whip the crème fraiche until thick before folding in the chocolate. Use some of this divine mixture to sandwich your cakes together. Then spread the remainder generously over the top. Now test your willpower and put it in the fridge for at least an hour to chill before topping it with your chocolate curls and tucking in!

I think I’m going to need a bit more practice to properly acquaint myself with my new oven (what a shame ;))…my first attempt turned out pretty well but I wrote this blog whilst watching the Great British Bake Off final…and delicious as it was I’m not sure it’d stand the Mary Berry test!

Leave a comment

Filed under Uncategorized

Afternoon Tea for…30!

Yesterday was a big day for me…my first ever afternoon tea catering job! I definitely don’t do things by halves…it was for a whopping 30 people and even though it involved an awful lot of baking and more pats of butter than I’ve ever seen in my life…I was completely in my element and loved every minute! 

In November last year I catered for my friend’s parents Ruby Wedding celebration and I can’t have done too bad a job because they asked me back to make afternoon tea to celebrate a double birthday, my good friend Han’s ‘30th’ and her gorgeous Granny Madge’s 90th…I felt ever so privileged!

I formulated a menu using a selection of my favourite recipes that I’ve tested since starting this blog. After a day and a half of baking, icing, crust removing, buttering, slicing and primping this was the final spread… 

Almond biscotti recipe here with the addition of a few added dried cranberries.

Sticky lime and coconut drizzle loaf recipe here.

Blueberry and soured cream cake recipe here.

Sticky toffee cupcake recipe here.

Chocolate brownie recipe here.

Devonshire scone recipe courtesy of my Mum below.

I took this job very seriously and even researched cucumber sandwiches on t’internet. I discovered that there are many ways to make them but the way I chose was to peel and slice the cucumber then soak it in a mixture of 1/2 cup of white wine vinegar and 1/2 cup of water for about 30 minutes. Before making the sandwiches I drained them well and patted them dry with some kitchen roll. I buttered the bread generously with salted butter, not only because it tastes better but because it acts as a barrier to stop the bread going soggy. And there you have them, and I quote…’The best cucumber sandwich ever’.

Sausage roll recipe here.

I’d been asked to make a veggie alternative to sausage rolls and after trawling the internet I came up with these amazing spinach and sundried tomato puff pastry pinwheels. I found the recipe on a blog site called Recipe Girl here. They were perfect for this event as I was able to make the filling the day before… 

Spread an even layer of it onto a couple of sheets of puff pastry…

roll it up…

wrap it in clingfilm and pop them into the freezer. So all I needed to do on the day was cut them into half inch slices, lay them on a baking tray and bake them at 200 degrees for about 25 minutes, until golden brown. They were so popular and were demolished in a matter of minutes!

One of the last things I baked were the Devonshire scones. I’d been reliably informed by my Mum that they’d be so much better if they were freshly baked on the day! So 7am Saturday morning, saw me making 40 of these beauts… 

I was amazed at how easy they were. To make about 10 small scones you need…

225g self raising flour

40g unsalted butter, at room temperature

150ml milk

1 1/2 level tbsp caster sugar

pinch of salt

Preheat the oven to 220 degrees and line a couple of baking trays with greaseproof paper.

You simply rub the butter into the flour until it looks like fine breadcrumbs. Stir in the sugar and salt. Then with a knife (it might sound weird but go with it, it works!) mix in the milk, a bit at a time until it forms a dough. If it seems a bit sticky, sprinkle in a bit more flour and if it seems a bit dry add a splash more milk. When you’re happy with the consistency, get in there with your hands and without overworking it bring it together into a ball.

Roll it out to about 2cm thick and using a small circular pastry cutter press down firmly to cut out your scones. Even though it’s very tempting to twist it…try not to otherwise you’ll be left with very lopsided scones! Mine did have a bit of a slope to them but I like to think that it gave them character! 🙂 

Finally dust the tops with some more sifted flour…

 and pop them in the oven for 12-15 minutes until they are golden brown…

Then the only thing you need to worry about is whether you’re going to go ‘Cornwall’ (jam first then clotted cream on top) or ‘Devon’ (clotted cream first then jam on top)…this managed to spark a great debate amongst the afternoon tea guests along with whether they were ‘scones’ (rhymes with gone) or ‘scones’ (rhymes with own) 🙂 I personally enjoy my ‘scon’ the Cornwall way every time…how about you?

Leave a comment

Filed under Uncategorized

They’re not Terry’s…they’re my chocolate orange cupcakes…

If you’re a Terry’s chocolate orange fan, you’ll absolutely love these cupcakes from The Hummingbird Bakery ‘Cake Days’ book…

The added bonus being that you don’t need to battle with the sphere of chocolatey orange goodness to enjoy the taste! Is it just me or is it ridiculously difficult to segment a chocolate orange in a ladylike fashion?

To make your own chocolate orange cupcakes you’ll need…

70g unsalted butter, softened

210g caster sugar

105g soft light brown sugar

2 eggs

1 tsp vanilla extract

1 tbsp finely grated orange zest

255g plain flour

50g cocoa powder

2 tsp baking powder

¼ tsp salt

240ml whole milk

Preheat the oven to 190 degrees and line a cupcake tin (or two) with cupcake cases. This recipe is quite generous, it made me 16 cupcakes.

Using an electric mixer, cream the butter and both sugars together until light and fluffy. Beat in the eggs one by one, followed by the zest and vanilla extract.

Sift the remaining dry ingredients (flour, cocoa powder, baking powder and salt) into the butter and sugar mixture on a slow speed, alternating with the milk until everything is incorporated. Then give it a medium speed whizz until smooth.

Fill the cupcake cases with the cake batter until they are two thirds full, don’t be tempted to overfill them or your cupcakes will end up with an unsightly ‘muffin top’!

Bake them in the oven for about 18 minutes or until the sponge springs back when pressed gently. I always err on the side of undercooking as opposed to overcooking and checked mine after about 15 minutes.

Once you’re happy that they’re cooked, remove them from the oven and leave to cool before frosting. 

For the frosting you need…

600g icing sugar

100g unsalted butter, softened

250g full fat cream cheese

60g cocoa powder

3 tsp finely grated orange zest

The recipe suggested using some candied orange peel, thinly sliced for decoration. Needless to say my local Tesco didn’t stock such a delicacy so I just did without.

Whisk the icing sugar and butter (try popping your butter into the microwave in a bowl for 30 seconds first) in an electric mixer on a slow speed until it has the consistency of coarse sand and there aren’t any big lumps lurking. Add the cream cheese and cocoa powder and turn the speed up to medium, mixing until the frosting is smooth and light. Finally stir in the orange zest by hand.

Smooth the chocolate orange frosting onto your cupcakes with a palette knife and if you were lucky enough to find candied orange peel you can use it to adorn each one. I hope that you’ll agree that they look sufficiently tempting without! 🙂

I didn’t think such a small amount of orange zest would provide such a delicious orangey taste…and as with all Hummingbird Bakery recipes…they are moist, light and deliciously more-ish!…


Leave a comment

Filed under Uncategorized

My first foray into the wonderful world of slow roasted pork belly…

My name is Jo and I’m a pork belly addict! There…I’ve said it! don’t they say that admitting to your addiction is the first step of recovery…in this instance however, maybe I don’t want to recover! If I’m presented with a menu containing a pork belly dish, I get tunnel vision and all the other (probably delicious) dishes pale into insignificance! 

I’ve never attempted cooking pork belly myself…that is until last weekend! I’ve been house sitting for some friends in Cambridge and in my mission for wholesome domesticity I invited my parents and brother over for Sunday dinner and decided to cook them ‘slow-roasted pork belly with the sweetest braised fennel’ a la Jamie Oliver.

I biked over to the market to pick up 2kg of pork belly and was very happy to see that the butcher took on the job of cutting off the pigs nipples for me…I’m not usually squeamish but the though of being presented with the task of lopping off a pigs nipple was a little beyond me! on a more practical note…I also got him to score the skin with a stanley knife before wobbling off home on my bike with very unbalanced handlebars.

To make the slow-roasted pork belly with braised fennel you need…

1 x 2kg pork belly on the bone, preferably free range

2 tbsp fennel seeds

salt and freshly ground black pepper

4 fennel bulbs, cut into sixths

A bunch of thyme

5 cloves of garlic, unpeeled

Olive oil

1 x bottle of white wine

Make sure you’re oven is whacked up to its maximum temperature.

Grind the fennel seeds with 2 tablespoons of sea salt in a pestle and mortar until they are a powder (due to my impatience my powder was still fairly coarse but it didn’t prove detrimental to the finished dish). Rub it into the score lines of your pork belly skin.

Put the fennel bulbs, thyme (just the leaves, not the stalks), garlic, a good slug of olive oil and seasoning into a large baking tray…

Lay your pork belly on top…

Put it into the preheated oven. After just 10 minutes, turn it down to 170 degrees and roast for another hour. Apparently putting it into a mega hot oven for a few minutes and then turning it down to slow roast is the key to amazing crackling!

This is what it looked like after 1 hour…

You then drain off any fat and pour the whole bottle of white wine over the fennel in the baking tray and return it to the oven for another hour…

This is what it looked like after 2 hours…

Now you remove the fennel from the tray, transferring it into another dish to either keep warm or, as I did, reheat later for a few minutes in the oven before serving.

It now goes back into the oven for its final stint. I cooked mine for a further hour a half to ensure the crackling was perfectly crackly!

Here it is in all it’s glory after three and a half mouth watering, crackle inducing, tender making hours…

What a beaut! (even if I do say so myself!)

Jamie recommended leaving it to rest for 10 minutes, which I did but then was so eager to get stuck in that any kind of carving finesse went out the window! I served it with mashed potato, the braised fennel and the deliciously concentrated juices that were left in the baking tray…

I’m not sure my photo’s really do it justice but I can tell you that it was absolutely amazing! My family were impressed and with the exception of the occasional murmur of delectation, were rendered uncharacteristically speechless for a good few minutes! 🙂

I encourage all fellow pork belly lovers out there to give this recipe a go!

I’m actually going to The English Pig, a restaurant entirely dedicated to pork dishes, in a couple of days. I hope to be able to indulge my love of pork belly further…but will it measure up I wonder! 🙂

Leave a comment

Filed under Uncategorized

The best laid plans of mice and men…last minute brownies & my trip to Playgroup Festival

When I wrote my last post I thought I was completely organised and ready for my weekend away at Playgroup Festival with only the final task of a baking a couple of batches of banana bread to complete. That was, until I spoke to my friend (and recent birthday girl therefore one of the main reasons I was taking cake to a festival!) and discovered the severity of her hate for banana’s doh! You know what they say about the best laid plans!? So in the last few minutes before leaving the office I changed tack and decided to make brownies instead I mean everyone loves brownie’s right?! I opened my dilemma up to my community of food lovers and bloggers on twitter, asking for brownie recipe recommendations and oh man they did not disappoint!

I was recommended these sea salt caramel brownie’s from the Baked Cookbook by @1mgoldstars, these from @yummly, @beaniebright told me to try Nigella’s flourless chocolate brownies which did look amazing but in the end I decided to follow a tip off from @newmassaros for these ‘ultimate very chocolatey brownies’ from The British Larder…

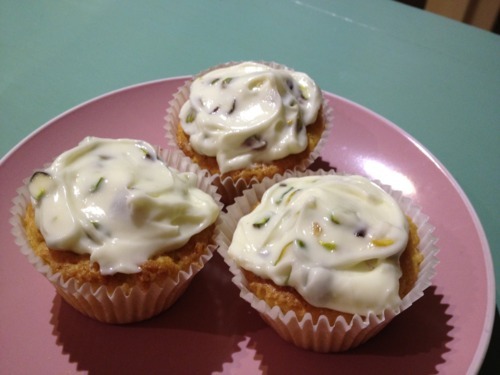
To make these amazingly gooey, deliciously chocolatey morsels you will need…

300g unsalted butter

300g dark chocolate (minimum 60% cocoa)

5 eggs

450g caster sugar

Seeds from 1 vanilla pod or 1 tsp vanilla extract

150g plain flour

50g cocoa powder

1tsp salt

Preheat the oven to 180 degrees and line a baking tray (approx 34 x 25cm x 6cm deep) with baking paper.

Break the chocolate into small pieces and put it in a bowl with the butter over a saucepan of simmering water. Stir until fully melted.

In another bowl beat the eggs, sugar and vanilla until they become thick, creamy and pale (don’t panic it doesn’t take long, even with a hand whisk and some elbow grease!).

Add the melted chocolate and butter mixture to the egg mixture slowly, whisking continuously to make sure it doesn’t curdle.

Finally sift the flour, cocoa powder and salt into the mixture and fold it in carefully.

Pour the brownie mixture into the prepared tin and smooth it over.

Bake for 20 minutes before checking on it. The aim is for it to be gooey in the middle but as the recipe says it ‘should not wobble’. If it’s still a bit wobbly when you shake it just pop it back in the oven for another 5 minutes and then check again.

Once you’re happy, leave it to cool (bear in mind that it carries on cooking as it cools). Then slice it into as large or small a sections as you fancy…

As I was cutting mine I panicked that I’d been a bit hasty and taken it out of the oven prematurely and that it was too gooey in the middle, however I was assured by @lexeat that it’s impossible to have an over-gooey brownie and lo and behold my fears were allayed when I offered it to my festival friends and they all fought over the gooeyest pieces from the middle J 

I can also confirm that it got even better after 2 days in a warm tent…I kid you not! Perfect festival baking!

Now a bit more about Playgroup…as I mentioned before it’s a very small, independent festival only in its second year. We were told there were only about 2000 people there, which made it wonderfully intimate and friendly and even I couldn’t get lost! J 

Everyone had thrown themselves into the spirit of the woodland animal fancy dress theme and my friends, who love an excuse to dress up, were no exception…

Due to its size the number of food stalls was minimal but it was very much a case of quality not quantity as the ones that were there were pretty darn good. One of my faves, which I stumbled across on the Saturday morning in my search for a good coffee was ‘Shitehawkes Coffee & Doughnuts’…

Where I was served by a man wearing a dressing gown and serenaded by a waistcoat-clad, shaven headed ukelele-er and funnily enough they served coffee…

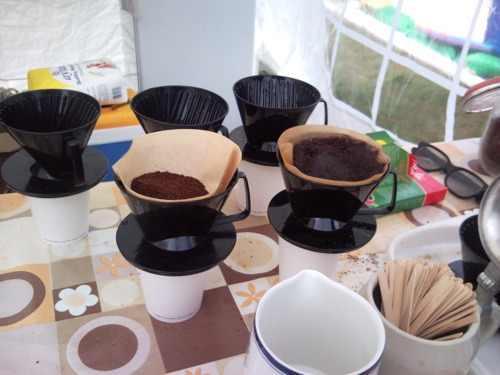
and little French style doughnuts…

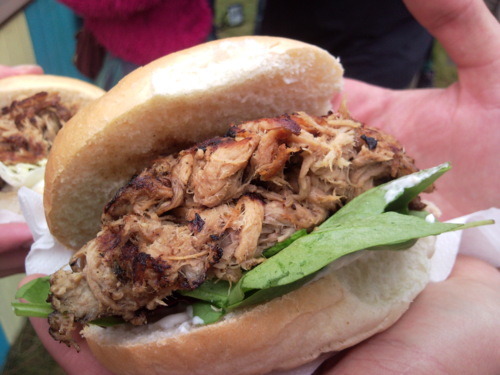
I also sampled a delicious vegetarian breakfast of scrambled egg, mushrooms cooked up with thyme, fried new potatoes with chilli flakes, grilled tomato, veggie sausage and a doorstep slice of soft granary bread and salted butter from the Lounged out Lizard tent and a great cuppa from Grannys Gaff but for me,the winner had to be Smokey Joe’s Caribbean Barbecue…

The pulled pork roll with salad and mojo mayonnaise was unbelievably tasty and worthy of some silent, eye closed savouring… 

Smokey Joe himself was a bit camera shy but I managed to pap him in the end (with his consent of course J)…

My friends also tried the jerk chicken and judging by their rave reviews I’d say Joe’s range of sauces may well be worth a try…

I also indulged in a fair amount of ‘Badgers Brew’ a light, hoppy, lager, which was brewed and named especially for the festival and of which we somehow managed to drink the bar dry!

We left the 3 day Playgroup extravaganza totally sated…with delicious food and drink, good music, an amazing pretension free atmosphere and great friends…how can you go wrong!

I’d just like to leave you with one of my favourite pics of the weekend…

1 Comment

Filed under Uncategorized

Banana bread baking…to accompany fancy dress-clad festival frolics in field…

It’s festival season again! This year I’m branching out from my usual jaunt to the Big Chill in an attempt to find a smaller, independent festival to switch my allegiances to. The festival of choice for 2011 is Playgroup, which promises fun and frolics in a field with zero arrogance and the added bonus of some woodland animal themed fancy dress…sounds ace!

Now, whilst some people may be sorting out their tent and wellies in preparation for such an event, I’ve been busying myself with making my mouse costume but more importantly, trying to decide what I can bake that will withstand being packed into tupperware and dragged across a field on a trolley 🙂 Last year’s plum traybake with cheesecake ripple withstood the challenge and went down a treat so I’ve got a lot to live up to.

I think I’ve come up with the perfect solution…I recently rediscovered my copy of ‘Miss Dahl’s Voluptuous Delights’ cook book by Sophie Dahl, who I’m quite open about being both horrendously annoyed by and supremely envious of. However, something I can’t begrudge her is that she knows how to make a mean banana bread…

and…it’s soooo easy to make!

You need…

75g butter, softened

4 ripe bananas, mashed

200g soft brown sugar

1 egg, beaten

1 tbsp vanilla extract

1 tsp bicarbonate of soda

1 pinch of salt

170g plain flour (or spelt or whatever)

Preheat the oven to 180 degrees and grease and line a 2lb/900g loaf tin.

Mix together the mashed banana, butter, sugar, egg and vanilla extract.

Add the bicarbonate of soda and salt and finally the flour.

Pour into the prepared tin and bake in the oven for about 1 hour (I always check after about 45 minutes by sticking a skewer or sharp knife into the centre of the cake…if it comes out clean, it’s ready). When you’re happy that it’s ready remove it from the oven and leave it to cool.

I’ve made other banana breads before but I have to say, this is definitely one of the best. Even better when you follow Sophie’s advice to slice it, toast it and serve it with butter…

I know what I’ll be doing on Thursday night in amongst trying to find my sleeping bag, novelty wigs, waterproof jacket, bin bags and mouse ears…baking a couple of loaves of delicious banana bread…they should at least see us through the journey! 🙂

1 Comment

Filed under Uncategorized