Feeling a bit under the weather and in need of some comfort baking today…buttermilk scones a la Darina Allen fresh out of the oven (recipe here).
Tag Archives: recipe
09/07/2011 · 4:21 pm
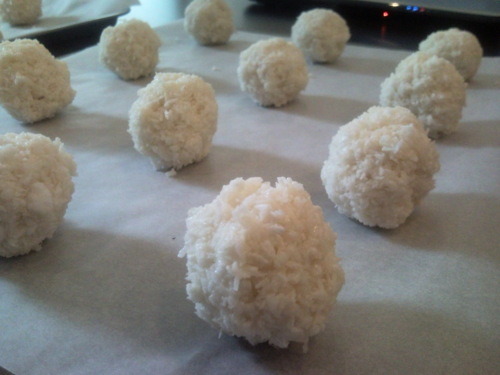
Moreish macaroons…
These little beauties are coconut macaroons…deliciously sweet and chewy on the inside and slightly caramelised and crispy on the outside…

Macaroons like these have been somewhat overshadowed by the pastel coloured, prettiness and popularity of the French macaron. I’m yet to pluck up the courage to make the French variety but my ‘ugly duckling’ macaroons as I’ve christened them, are soooo easy make…but beware they come with a warning…you’ll need a lot of willpower to not devour the whole lot in one sitting! actually you’ll be lucky if you can resist until they’re fully cooled 🙂
To make about 24 macaroons you’ll need…
4 egg whites, at room temperature
200g granulated white sugar
1/4 tsp salt
1 tsp vanilla extract
60g plain flour, sifted
300g dessicated coconut
Whisk the egg whites, sugar, and salt in a heatproof bowl placed over a saucepan of simmering water. When the mixture is warm and nice and creamy it’s ready! So remove it from heat and stir in the vanilla extract, flour, and dessicated coconut.
Cover and put in the fridge for about two hours, or until firm.
Preheat the oven to 165 degrees and line two baking sheets with baking paper.
Take a tablespoon of the cooled coconut mixture at a time and roll into a ball between your palms before placing on the prepared baking sheets. Make sure you leave about an inch or so gap between your macaroons so they have room to expand…
Bake for about 15 to 20 minutes or until golden brown.
Remove from the oven and let them cool on the baking sheet for about 10 minutes and then transfer them onto a wire rack to cool completely…

I challenge you to wait that long before sampling them!
They were delicious warm from the oven, delicious once they’d cooled and…after forcing myself not to finish the whole batch in one sitting, I discovered they’re still equally as delicious a couple of days later!

The recipe I used was from the Joy of Baking website.
Filed under Uncategorized
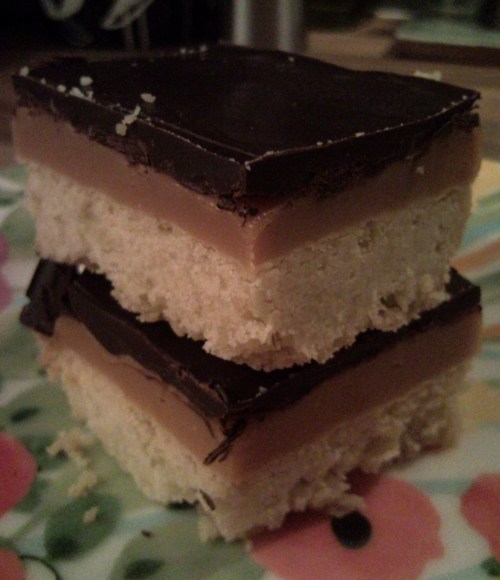
Not just any old millionaire’s shortbread…
This fine specimen of home baked goodness isn’t just your common or garden millionaire’s shortbread…No!…nestled between the layer of gorgeous, dark chocolate and the thick, gooey layer of homemade caramel is a sprinkling of flaked maldon sea salt just waiting to get your taste buds going!
I’m a self confessed salt fiend as documented here, so this recipe for salted caramel millionaire’s shortbread is right up my alley! Salted caramel in both desserts and chocolates seem to be all the rage at the moment and all I can say is, if you haven’t tried it…you’re missing out! The salt acts to balance out the super sweetness of the caramel, blending into the overall taste. However in this case I consider it very lucky to come across one of the little nuggets of saltiness, the way it zings and melts on your tongue really is something special! Don’t just take my word for it though…try it for yourself!
Here’s how to make it…
Preheat the oven to 170 degrees and line a 30 x 22cm (12 x 9in) tin with greaseproof paper to make it easier to get the shortbread out later.
For the shortbread layer you’ll need…
300g plain flour
325g butter
80g caster sugar
3 tsp cornflour
1/4 tsp salt
The recipe I was following told you to put the shortbread ingredients into a food processor and whizz it up until the mixture comes together in a ball. However, I don’t own a food processor so I just rubbed the butter into dry ingredients by hand…don’t worry if, like me, you’re sans snazzy kitchen equipment…it’ll turn out just as good but will just take a little longer. Whichever method you use, once the ingredients have come together into a ball, take the shortbread and press it into the bottom of your prepared tin, making it as even a layer as possible. Prick it all over with a fork. Bake it for five minutes before turning the oven down to 150 degrees and cooking for a further 30 minutes, or until pale golden. Remove it from the oven and leave it to cool in the tin.
For the caramel layer you’ll need…
115g butter
400g tin sweetened condensed milk
4 tbsp golden syrup
1 tsp Maldon sea salt flakes
225g good-quality dark chocolate (for the topping)
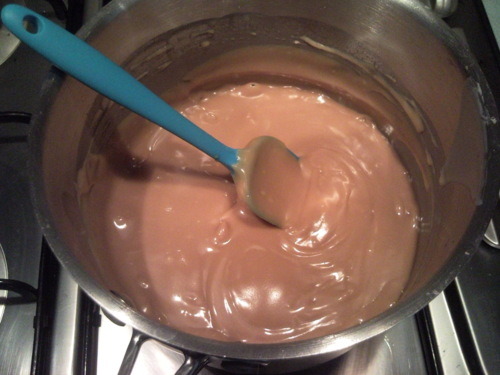
Melt the butter in a pan over a low heat then stir in the condensed milk and golden syrup. Bring the mixture to a simmer…
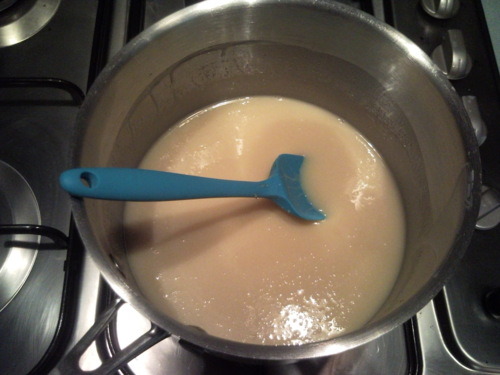
Try to keep the temperature even and cook for about 10 minutes, stirring continuously…

You’ll know it’s ready when it’s thick and golden-brown…
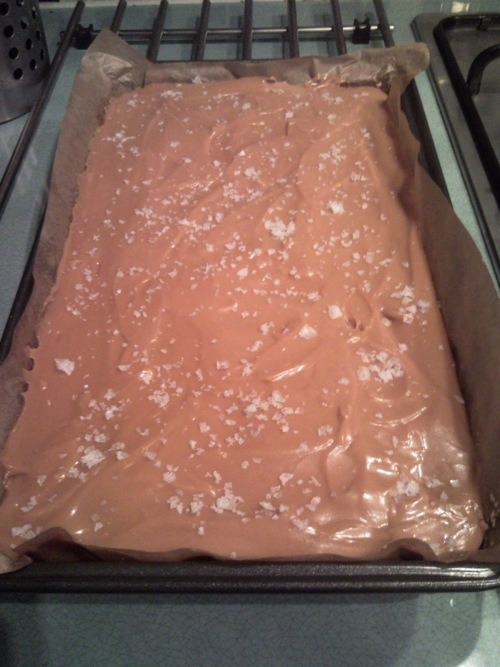
Pour your gloopy caramel evenly over the cooled shortbread. Leave it to cool a little and when it’s formed a slight skin sprinkle over the magic sea salt flakes! Now leave it to set for about half an hour…
Finally, break the chocolate into pieces and melt in a bowl over a pan of simmering water. Leave it to cool for five minutes before pouring it over the caramel. The recipe gave me a great tip to ‘create a nice smooth surface by tilting the tin so that the chocolate runs into the corners’…perfection…

Leave it to cool in the fridge for an hour or more if you have time. Apparently you can also sprinkle a little more salt on the surface of the chocolate before it’s completely set, I wasn’t sure my chosen guinea pigs were quite as in to their salt as me so I decided not to overdo it!
When the surface is completely set and cold you can lift it out of the tin…

and cut it into squares…


Not only does the addition of the salt add a whole new delicious dimension to this millionaire’s shortbread but the cornflour in the shortbread layer makes it just melt in the mouth…all in all a raging success, even if I do say so myself! 🙂
Filed under Uncategorized
Coffee & cake…the perfect Union!
Last week I was invited to attend Taste of London by Union Hand-Roasted Coffee. It’s no secret that I’m a complete coffee (not to mention good food) addict…so I obviously jumped at the chance! I turned up wearing extremely unsuitable footwear, having just left my umbrella on the bus on what was one of the greyest, most miserable, rainy, English summer days ever! However we didn’t let the rain stop play and instead we did what any true Brit would do…donned a fetching poncho and braved the weather in search of some tasty morsels…and amazing coffee of course!
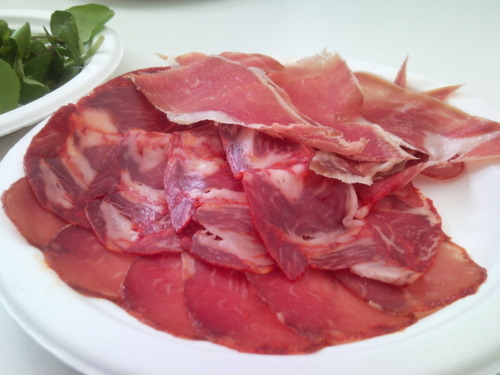
First stop was the Barrafina, Fino and Quo Vadis stands where we sampled these delicious dishes…


After which we were led to the Union stand where Jeremy (pictured below) talked us through some of the latest Union coffee varieties. I love people who are enthusiastic about their subject matter and Jeremy’s passion for coffee was totally infectious…I dare say he could have lured even a non-coffee drinker over to the dark side of caffeine consumption…

He talked about the fact that we need to make people realise that coffee isn’t JUST coffee! There are so many varieties and brewing methods, which all produce very different tastes and experiences. There is no right or wrong opinion when it comes to drinking coffee and everyone will have their own preference….it’s more about feeling able to express that preference and building your own vocabulary to describe what you like…coffee drinkers liberation if you will!
We then tried some La Esperanza Geisha from Colombia prepared in a syphon, very reminiscent of school science classes…

Then Rwandan abahuzamugambi ba kawa ‘exceptional lot’ maraba, prepared in a pour over…

And their Gajah mountain, Aceh, Sumatran coffee, which packed a real punch, prepared in an Aeropress…

I was in total coffee heaven and the lovely Union guys, packed me off with enough coffee to keep me awake for days!

I headed off for a wander around the rest of the festival, sampled a dish of slow cooked lamb with buttered potato and caramelised onion gravy from The Rhodes 24 stand…

And even bumped (not literally) into Marcus Wareing…

Now, I’m a bit of a recipe hoarder and have recently started taking photos of recipes that catch my eye on my phone; sometimes they’re from magazines or sometimes from friends cook books. I don’t even remember where some of them are from but they’re stored away until the perfect baking occasion presents itself! On my way home from Taste I remembered one such recipe that I’d stashed away a few weeks ago…the perfect opportunity to use some delicious Union coffee…
As soon as I got home I whipped up a coffee poppy seed cake…

To make it you’ll need…
100g poppy seed
80g sour cream
150g plain flour
1 tsp baking powder
1 tsp bicarbonate of soda
½ tsp ground cinnamon
Pinch of salt
150g butter, softened
250g caster sugar
3 eggs
1 tsp vanilla extract
40ml espresso
You need to do a tiny bit of advance prep before you can make this cake by stirring the poppy seeds into the sour cream and leaving them to ‘soak’ for at least 2 hours (or overnight if you have time).
Heat the oven to 170 degrees and line a 20cm or 22cm tin with baking paper.
Sift the flour, baking powder, bicarbonate of soda, cinnamon and salt into a bowl and set aside for later.
In another bowl, cream together the butter and sugar until light and fluffy. Add the eggs one at a time; adding a spoonful of the flour mixture after each egg so that the cake batter doesn’t curdle. Mix in the vanilla extract and espresso. Finally fold in the remaining flour mixture, alternating with the sour cream and poppy seeds. Stir until just combined but try not to overmix.
Pour the cake mixture into your prepared tin, smooth the top and bake for 35-40 minutes. If you’re using a 20cm tin it may need an extra 5 minutes of so as the cake will be deeper but test it after 40 mins by inserting a skewer into the centre…if it comes out clean it’s ready!
Leave it to cool in the tin for a few minutes then turn it out onto a rack to cool completely before icing.
For the icing you need…
50ml espresso
125g icing sugar
Beat the espresso with the icing sugar until it’s smooth and lump free and simply pour it over the cake to create a gorgeous coffee glaze!
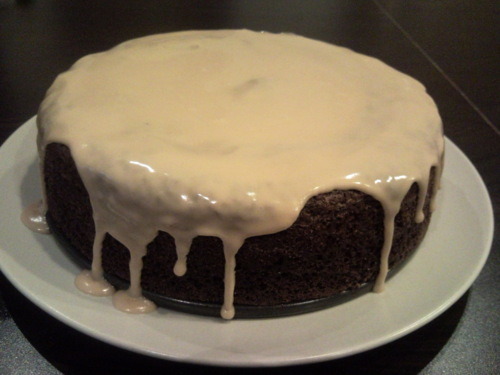
I don’t think I’ve ever tried a cake quite like it…deliciously unusual! The coffee gave the cake the most amazing richness and the poppy seeds added a great crunch! It was extremely moreish…the perfect accompaniment for a cup (or 3) of Union Hand-Roasted Coffee!

Filed under Uncategorized
Wedding season is upon us…
The last 2 weekends have been devoted to matrimonial celebrations…a whirlwind of gorgeous dresses, buffets, booze, confetti and cakes, topped off with a healthy dose of air guitaring and shape throwing on the dancefloor 🙂
I realise that the standard protocol for wedding presents is to buy the happy couple something from their wedding list but…I don’t like to conform and instead decided that a home baked cake was a far better present! Once again I put my cake-transporting-on-London-buses skills to the test and somehow managed to get this little beauty all the way to Whetstone unscathed…

I was very proud of of the finished cake, although the perfectionist in me was a bit disappointed in the slight non-uniformity of the heart and…I was told by a guest that I wouldn’t cut it as a plasterer! the cheek! But it’s the thought that counts right? and whether it actually tastes any good (which it did!).
What you can’t see from the photo above is that beneath the layer of gorgeous cream cheese frosting is a triple layer red velvet cake….

I followed the Hummingbird Bakery recipe, which I’ve used previously to make these cupcakes.
To make an 8 inch cake you need…
120g unsalted butter
300g caster sugar
2 eggs
20g cocoa powder
40ml red food colouring (the recipe recommends Dr Oetker red food colouring but I used concentrated gel, which means you can use a lot less)
1tsp vanilla extract
240ml buttermilk
300g plain flour
1tsp salt
1tsp bicarbonate of soda
3tsp white wine vinegar (weird I know but stay with me here)
Preheat the oven to 170 degrees and line an 8 inch cake tin. I made do with 1 tin and sliced my cake into 3 but if you’re lucky enough to have 2 or 3 tins you can make the layers separately.
Put the butter and the sugar in a freestanding electric mixer or use a handheld version to beat them until light and fluffy. Add the eggs and mix on a lower speed until they are well incorporated.
In a separate bowl mix the cocoa powder, red food colouring and vanilla extract together to make a thick, gloopy, dark red paste. If you’re using the concentrated gel food colouring you only need about 1tsp but you may need to add a splash of water to make it into a paste.
Add your red gloop to the butter mixture and blitz it up until evenly coloured.
Pour in half of the buttermilk and mix at a slow speed, add half the flour and mix, then add the rest of the buttermilk and finally the remaining flour. Then give it one last mix just to make sure.
Finally, add the salt, bicarbonate of soda and vinegar (which creates an enjoyable fizz!) and mix it slowly into the cake batter for a couple of minutes.
Pour the finished mixture into your prepared tin(s) and put in the oven.
If you’re using 3 tins, bake for about 25 mins.
If you’re using 2 tins, pour a third of the mixture in one (this will need to cook for 25 mins) and two thirds of the mixture in the other (this will probably need a few minutes more approx 30/35).
If, like me, you’re lacking in the the tin department and are just using the one, you’ll need to cook it for about 50 minutes. I checked mine after 45 minutes but it was still very runny in the middle. You’ll know it’s ready when a knife or skewer inserted into the middle of the cake comes out clean.
Leave the cake to cool fully before icing it. To make the icing you will need…
600g icing sugar
100g unsalted butter (at room temperature)
250g cream cheese (cold)
Beat the icing sugar and butter together (this gets a tad messy) using either a freestanding or handheld electric mixer. The recipe says to beat it until the mixture comes together but I always lose patience and in an attempt to limit the amount of icing sugar wafting around my kitchen, I add the cream cheese pretty much straight away. I usually zap the butter in the microwave for 30 seconds first aswell, to make sure that it blends in well and that there aren’t any little lumps of butter left in the icing. Once all of your icing ingredients are incorporated, turn up the speed and beat well for about 5 minutes until smooth and creamy. Be careful not to overbeat it or it’ll become runny.
Use the icing to sandwich each of the 3 layers and to coat the top and sides of the cake. I use a metal spatula, which I dip in boiling water regularly…it makes smoothing the icing out a lot easier.

I think I may have gotten a bit carried away with the glittery sprinkles but I reckon the decoration fitted perfectly well with the brash, garish-ness of the bright red velvet sponge cake inside…


Who would’ve thought that a cake containing buttermilk and vinegar would work…but it does! and produces a gorgeously moist cake everytime!

Filed under Uncategorized
What happens if you cross 11 avid foodies with a private chef?…
I love being in the right place at the right time…which is exactly where I was early on a Saturday morning, sitting at my laptop when an email popped into my inbox from Luiz, the London Foodie. He was offering up a couple of spaces at his London Cooking Club the following weekend due to cancellations. I jumped on it without a second thought as spaces are highly sought after and I’d had a great evening last time I attended the evening of French Provincial Cooking using recipes by Elizabeth David. The theme of this month’s club was ‘The Best of British’ and I was very excited to learn that we were to have our very own chef on hand for the evening to help us put the finishing touches to our dishes. Our Private Chef, David Gillott, runs his own company, catering for dinner parties, functions, weddings and even offering cookery classes in your own home! Our epic menu was made up entirely of David’s own recipes with a British Theme…

The idea of London Cooking Club is for each guest to choose and prepare a dish from the set menu for everyone to taste, along with a wine to accompany it.
First up Gina Wessels, who writes a blog called Midweek Feast made mini Yorkshire puddings with roast beef…

Amazingly, it was her first ever attempt at Yorkshire puds, they were delicious and piled high with tender beef and some really good, hot horseradish sauce, which Im reliably informed I can pick up from Waitrose!
Hugh and Liz, our lovely hosts served rillette of salmon in perfect quenelles on melba toast…

We all seated ourselves around a huge table in Hugh and Liz’s open plan kitchen and tucked into traditional potted shrimps, made by May of Slow Food Kitchen fame…

Asparagus with hollandaise sauce also from Hugh and Liz…

Rosemary brought along what seemed like a never ending platter of fresh dressed crabs…

Believe it or not we were still only on the starters at this stage, the last of which was chilled watercress soup. I hit the jackpot and was served my soup in the highly coveted Gruffallo cup :)…

Next up Hana served a jerusalem artichoke pithivier…

I’d never heard of a pithivier before and was enamoured by the delicious mixture of artichoke, mushroom and puy lentils all encased in crispy puff pastry…

Libbie made one of my all time favourite dishes…kedgeree! Libbie’s a great cook but admitted she’s never even tasted a kedgeree before let alone made her own…luckily David was on hand to advise and the finished dish was amazing!…

The prize for most spectacular dish goes to Luiz and Gerald’s beef wellington…


The pastry was crisp, the meat was oh so tender and it was served with a potent wild mushroom sauce, which accompanied it perfectly…

Su-Lin’s English garden salad was the final part of the epic main course… potatoes, runner beans, lancashire cheese, sunblush tomatoes and mint in a honey and mustard dressing…

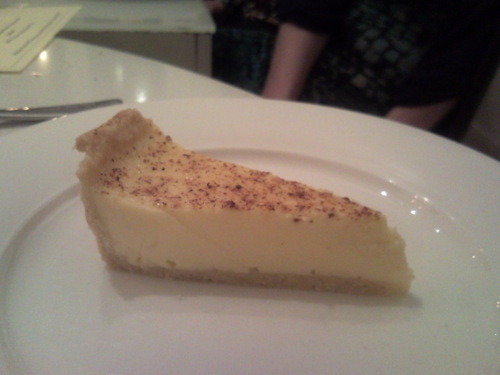
Finally it was my turn! I’d asked to make the baked egg and vanilla custard as it’s something I’ve never made before and as you may have realised by now…I’ve got a bit of a sweet tooth!
I made my tart on Friday night just in case it went wrong so there was still time for a second attempt. The finished product looked a bit more ‘rustic’ than I’d hoped…

But luckily David’s recipe (see below) produced an amazing tart, the buttery rich, lemon infused pastry, balancing the creamy custard filling and freshly grated nutmeg perfectly…
Earlier in the week I’d written to my good friend, Hannah, who’s Publisher of Imbibe Magazine and asked for her advice on what wine I should serve with my tart. She replied with a recommendation from none other than Kelvin McCabe, Head Sommelier at Zuma, who said that I should be going for a sweet wine with good acidity, light to medium bodied with clean citrus notes such as an Auslese Riesling, a young fresh Sauternes or a Coteaux du Layon. I visited a local wine shop and chose a half bottle of Le Grand Chai Sauternes 2006…deliciously fruity with mellow honey notes without being too overly sweet…

Last but not least, David took the floor and made us a layered dessert of rhubarb jelly, white chocolate mousse, rhubarb compote and a surprise layer of popping candy…

all topped off with some very ‘cheffy’ foam! It was a beautiful concoction and tasted pretty darn good too…

How we managed to fit it in after 10 courses I will never know but we all scraped our glasses clean! After a restorative peppermint tea, we dragged ourselves home to have a well deserved lie down! All in all a wonderful evening full of divine food and passionate foodies!
And here’s how you make David’s baked egg and vanilla custard …
For the pastry case you need…
225g flour, plus extra for dusting
pinch of salt
zest of 1 lemon
150g butter
75g caster sugar
1 egg yolk
1 egg
Rub together the flour, salt and butter until the mixture resembles breadcrumbs. Adding the lemon zest at the rubbing in stage made sure it was really infused into the mixture…a great touch! Stir in the sugar. Beat the egg yolk with the whole egg and slowly add these to the dry mixture until the pastry forms a ball. This stage got a bit sticky but don’t panic just wrap the dough tightly in cling film and put it in the fridge for a couple of hours.
Preheat the oven to 170 degrees.
Roll the pastry out on a lightly floured surface until it’s about 2mm thick. Lay it over an 18cm/7inch flan dish, carefully pressing it into the corners and trimming the edge. Line it with greaseproof paper and fill with baking beans. Put it in the oven to blind bake it for about 10 minutes or until the pastry is starting to turn golden brown. Remove the paper and beans, and allow to cool.
For the custard filling you need…
9 egg yolks
75g caster sugar
500ml whipping cream
freshly grated nutmeg
Turn the oven down to 130 degrees.
Whisk the yolks and sugar together. Add the cream and mix well. Pass the mixture through a fine sieve (I used a square of muslin in a normal sieve as I was worried mine wasn’t fine enough) into a saucepan and heat it to blood temperature. I’m not sure how important the temperature is but I realised I wasn’t sure what blood temperature actually was…I recommend going with your gut ;). Once you’re happy with it fill the pastry case with the custard until it’s 5mm from the top. Carefully place the dish in the middle of the oven and bake for 30-40 minutes or until the custard appears set but not too firm. Once cooked, remove it from the oven and cover the surface liberally with grated nutmeg.
Leave it to cool to room temperature before cutting the tart with a sharp knife. David recommended wiping the knife between cuts to keep it uber neat. Then all that’s left to do is sit back and enjoy…preferably wih a chilled glass of Sauternes! 🙂
Filed under Uncategorized
A bit of crumpet
Are you sitting comfortably? yes? good, because I’m about to take you on an epic journey of crumpet experimentation…
Behold, my gorgeous, freshly homemade crumpet dripping with melted butter…

And now behold the saga that preceded that innocent looking bit of crumpet 😉 …
Way back in January I read Food Stories blog post ‘Cracking Crumpets’ and loving nothing better than a challenge, felt compelled to give crumpets a go! The reality is that it’s taken me nearly 4 months to get my act together. But this weekend I embraced my un-hungover state, got straight out of bed and into the kitchen…baking in pyjamas is what Sundays are all about!
So following Food Stories recipe, to make approx 14 crumpets you need…
360g plain flour
2 tsp dry yeast
580ml warm milk
1 1/2 tsp salt
1 tsp sugar
1 tsp bicarbonate of soda
Mix the the yeast and the sugar in a bowl with 250ml of the warm milk. The milk needs to be warm to activate the yeast but not hot! Cover the bowl and leave it in a warm place for about 10 minutes to go frothy.
Sift the flour, salt and bicarbonate of soda into a big bowl. Make a well in the centre and add the yeasty mixture and finally the rest of the warm milk. Stir using a wooden spoon until smooth. Cover it with cling film and leave it to rest in a warm place for about an hour. Food Stories said that the clingfilm would rise up as the gases build up inside the bowl but fo some reason mine didn’t. I have a feeling that this might have been the reason that my finished crumpets were lacking in holes!
To cook the crumpets you need to heat a heavy bottomed frying pan over a medium heat then turn it down low. Using a piece of kitchen paper, wipe some oil over the base of the pan so it’s got a thin coating all over. Also oil your crumpet rings very well! Then our the batter into the rings.
Behold attempt #1…

I was very excited to see bubbles forming on the surface and had high hopes, which were dashed when this is what I ended up with…

I moved swiftly on to attempt #2, this time making sure I didn’t stinge on oil when greasing my crumpet ring…

Food Stories instructions said to leave the crumpets to cook for about 8 minutes until the top looks like it’s drying out, mine were taking longer than 8 minutes to get to that stage but following twitter advice from @Cookinfrance to ‘hold fast & wait for those bubbles!’ I held my nerve and waited. Once they reached what I felt was dried out looking enough, I turned them over for a short while just to brown the top…

Attempt #2 was definitely looking more crumpety but I decided I’d try not filling the ring all the way to the top…halfway is more than enough to make a good crumpet.
By attempt #3 I was getting cocky (read impatient) and started cooking 2 at a time…

Less is most definitely more…I was chuffed to see that I’d finally made my very own crumpets, that actually looked and tasted like crumpets…

The only thing my crumpets were lacking were holes! I’d followed the advice given to Food Stories by Ms Marmitelover to add more bicarbonate on soda than the recipe says and still my bubbles didn’t seem to want to surface. As time passed a few more holes graced me with their presence…

and with each attempt my crumpet confidence grew until I was producing these beauties…

I can vouch for the fact that the lack of holes didn’t affect their deliciousness. My crumpets were the perfect weekend tea time treat, one that I’ll definitely be making again…practice makes perfect right!?

Filed under Uncategorized
My Easter cardamom coffee mud (alternative wedding) cake
With the long weekend stretching ahead of me, I finally had time to do a bit of baking. I’ve got a vast collection of food magazines with post it notes sticking out of them marking ‘must bake’ items. A cake in a back issue of Olive magazine has been playing on my mind recently so the decision of what to bake for my family this Easter was a real no-brainer…the cake of choice…a very naughty looking cardamom coffee mud cake…
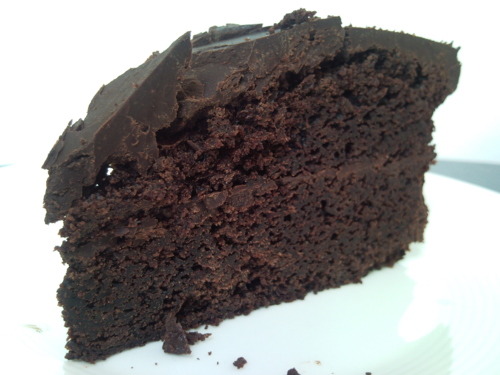
In my opinion you really can’t go wrong with a cake that contains strong cardamom infused coffee and no less than 600g of dark chocolate!
To make it you need…
12 cardamom pods, seeds removed and pods discarded
200ml strong coffee
200g dark chocolate
200g unsalted butter
3 eggs
80ml soured cream
400g golden caster sugar
170g plain flour
1tsp bicarbonate of soda
30g cocoa powder
Preheat the oven to 160 degrees. Grease and line a 23cm cake tin with greaseproof paper.
Lighty crush the cardamom seeds in a pestle and mortar before adding them to a saucepan with the strong coffee. Simmer this fragrant concoction for about 10 minutes until it has reduced down to 120ml.
Melt the chocolate and the butter and add in the reduced coffee and cardamom mixture.
Beat the eggs, soured cream and sugar together. Add this to the chocolatey, coffee goo and stir until combined.
Finally sift the flour, bicarbonate of soda and cocoa into the bowl and fold it in before pouring the complete mix into the prepared tin.
Bake for 1 hour, check whether it’s cooked by inserteing a skewer or sharp knife into the centre of the cake, if it comes out clean, it’s ready, if not, put it back in the oven for a few more minutes.
Whilst it’s cooling you can prepare your ganache mud icing…beware…reading any further may cause hardening of the arteries!
To make your mud frosting you need…
400g dark chocolate
100g unsalted butter
1tbsp golden syrup
Melt the chocolate in a saucepan and then add the butter in small lumps so that is melts into the mix. Add the golden syrup and stir until smooth. Leave the mud to cool until spreadable. This requires patience, which I don’t have, in my haste I made the mistake of trying to hurry the process along by putting it in the fridge…this accelerated the process too much and when I tried to spread the icing onto the cake it hardened into a big unspreadable blob! PANIC set in but with the help of my Mum, a spatula and a jug of boiling water I managed to avoid total disaster! You should learn from my mistakes but if you happen to have this issue too, all you need to do it warm a metal spatula or knife in boiling water and gradually smooth the icing over the cake, do a bit at a time and then reheat your implement and work on smoothing another section of icing. I’ve learnt my lesson…next time I’ll just leave the mud to cool gradually (out of the fridge) it would benefit from still being fairly gooey for optimum spreading consistency.
Cut the cake in half and spread a layer of mud in the middle before sandwiching it and coating it all over with a thick layer of amazing, so bad it’s good for you, muddy ganache!
and hey presto…it wasn’t a complete disaster and was still a goregously dense chocolate cake with a cardamom coffee twist and a coronary inducing coating…mmmmm!

I got a bit carried away with my decorating and as if the chocolate ganache frosting wasn’t enough I decided to kitsch it up with some Easter decorations and a huge gold bow so it ended up looking like some kind of alternative wedding cake :)…

As a perfectionist, I wasn’t 100% happy with the finished appearance of the cake but it turned out to be absolutely delicious. It only contained only the tiniest amount of flour, which meant that it was amazingly dense and fudgy, even my sister who doesn’t like cake, loved it!
Filed under Uncategorized
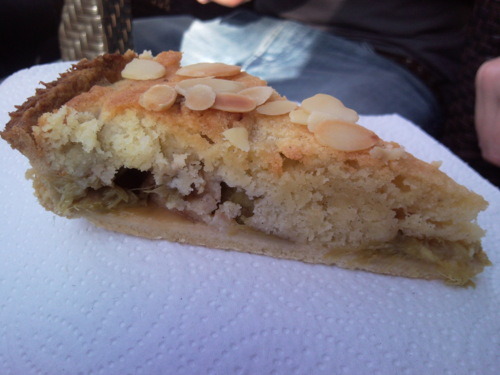
What a load of old rhubarb (bakewell tart)…
I’m still taking advantage of rhubarb being readily available on the supermarket shelves at the moment and on a recent rummage through my baking cupboard I discovered no less than 8 half used packets of ground almonds, luckily all still within their best before dates! I asked my good friend google what I could make with ‘rhubarb’ and ‘ground almonds’ and was presented with multiple rhubarb crumble recipes, but in amongst them I found a lovely blog called Girl Interrupted Eating and a gorgeous sounding recipe for Rhubarb and Almond Tart. Decision made, I turned my music up loud, poured a glass of red wine, donned my apron and started baking my own rhubarb bakewell tart…
To make the shortcrust pastry base…
300g plain flour
150g butter, chilled and cut into cubes
3 tbsp caster sugar
3tbsp of water
Sift the flour into a bowl, add the butter cubes and rub together with your fingertips until the mixture looks like fine breadcrumbs.
Add the water and mix to form a dough. I find it’s easiest to get you hands in there and bring the dough together into a ball. Then wrap it in cling film and chill for 20 minutes in the fridge.
Preheat the oven to 200 degrees. Prepare a 30cm tart dish by greasing it with butter and dusting lghtly with flour (that’s what my mum always does).
For the filling…
500g rhubarb cut into 1cm lengths
150g butter
150g caster sugar
150g ground almonds
100g self raising flour
2 eggs
1 vanilla pod
Zest of one orange
2 tbsp flaked almonds
Roll out the chilled pastry and line the tart tin. Lie a sheet of greaseproof paper on top and pour in some baking beads (rice works just as well). Put the pastry case in the oven to bake blind for 25 minutes.
Put half of the rhubarb in a saucepan, cover and cook for 5 minutes. I also added a squeeze of the orange juice into the mix.
Meanwhile you can make the almondy filling…
Becky’s recipe said to use a food processor to blend together the butter and sugar but I don’t have one so I used my handheld mixer to cream them together until light and fluffy. Add the ground almonds, flour, eggs , seeds scraped from the vanilla pod and the orange zest and mix well.
Turn the oven down to 175 degrees.
Remove the baking beads and paper from the pastry case and leave somewhere to cool. Mix the cooked rhubarb with the raw rhubarb and spread over the bottom of the pastry lined tin. Spoon the almond mixture on top and spread it out as evenly as possible, although I found this easier said than done and got in a pickle!
Put the tart in the oven for 40 minutes until golden on top. After about 30 minutes scatter the top of the tart with the flaked almonds so that they toast slightly.
And there you have it…


Bakewell tart with a rhubarbey twist! The flecks of vanilla and orange zest in the moist almond layer were a delight. The balance of the sweet almondy cakey layer with the tang of the unsweetened rhubarb was perfection.
I packed up my the tart and transported it all the way to Winchester for a friends birthday, only to find out that he didn’t even like rhubarb! We did a pretty good job of polishing it off for him though, even enjoying a slice the morning after the night before…rhubarb bakewell tart…breakfast of champions!

Filed under Uncategorized
Sticky rhubarb & ginger cake…Mum this one’s for you!
Last weekend my Mum presented me with a new recipe book, ‘Jamie’s Monster Bake Sale’ a collection of recipes put together by Jamie Oliver for Red Nose Day, to raise money for Comic Relief and the Jamie Oliver Foundation, not only through it’s sale but by encouraging people to try the yummy recipes and raise money by holding….you got it…a Monster Bake Sale!
All of the 13 recipes sound amazing and the 2 I’ve tried so far have been super tasty. As she handed it over, my Mum raved about the delicious looking sticky rhubarb and ginger cake at the back of the book. So my choice of Mother’s Day present was pretty much a no brainer!
Here it is…sticky rhubarb and ginger cake for my Mum…


Preheat the oven to 180 degrees and line a 20cm round cake tin with greaseproof paper.
To make the rhubarb topping…
250g rhubarb
100g caster sugar
2 tbsp stem ginger syrup
Slice the rhubarb into 4cm lengths and put them in a pan with the caster sugar and 2 tbsp of syrup from the jar of stem ginger. Bring to the boil, and then turn down and cook on a low heat for 5 minutes until the rhubarb is cooked but hasn’t turned to slush.
For the cake…
200g butter
150g dark brown sugar
2 tbsp golden syrup
150ml milk
2 eggs
300g self raising flour
2 tsp ground ginger
3-4 balls stem ginger, finely chopped and 2 more tbsp of the syrup
Heat the butter in a pan with the dark brown sugar and golden syrup, once melted set aside to cool.
Whisk the eggs with the milk and mix them together with the cooled butter mixture and finally the remaining ingredients (flour, ground and chopped ginger). Stir well before pouring into the prepared cake tin.
Carefully arrange the strips of rhubarb on top of the cake mix but save the magic rhubarb syrup for later. Bake the cake for 1 hour 20 minutes until it’s risen and beautifully golden. After an hour you can sneak a peek and if it looks like the top of the cake is browning a bit too much, loosely cover it with some tin foil for the last few minutes of cooking. When you think it’s ready, insert a skewer into the middle of the cake. If it comes out clean…it’s ready!
Here comes the best bit…spoon the sticky rhubarb syrup over the hot cake. This produces a very pleasing sizzle and a sweet, spicy, fruity aroma to die for!
Fresh out of the oven…

Try to exercise some self restraint and leave it to cool in the tin, giving the syrup time to work its way into the cake, before serving…

It turns out that the women in my family are very well tuned into each other…I discovered that we came dangerously close to having 2 sticky rhubarb and ginger cakes to gorge on…it was so delicious, it wouldn’t have been much of a hardship to be honest with you! It had a great dense but moist texture with little juicy nuggets of stem ginger throughout and the slightly tart rhubarb to cut through it, taking away any sickly sweetness!

Why not serve with crème fraiche, cream, custard, ice cream or just simply on its own…in my book, anything goes and the possibilities are endless!
Filed under Uncategorized
