Chocolate, marmalade & hazelnut cake…serious chocoholics venture forth!

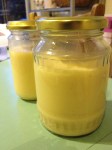
Due to my recent Seville orange marmalade escapades (blogged here) I have 10 jars of the wonder stuff sitting, looking up at me from my bedroom floor (maybe not the standard place for marmalade storage but let’s face it, not many people are lucky enough to have a larder like Nigella’s!). They serve as a constant reminder that there’s so much baking I’d like to be doing but, frustratingly, not enough hours in the day to do it!

I treated myself to a relaxing Saturday morning holed up in bed, under the duvet, perusing cook books and deciding what was next on my baking agenda. I eventually settled for a chocolate, marmalade and hazelnut cake from Rachel Allen’s ‘Bake’ book…

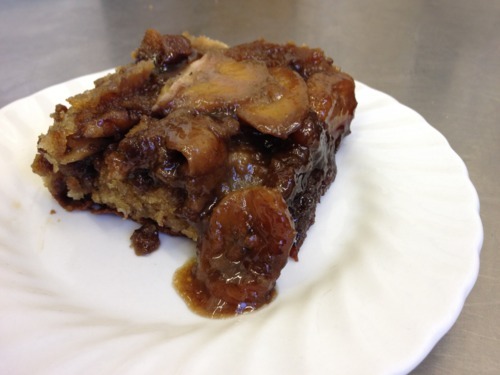
It appealed to me because, not only would I be able to use my yummy marmalade but also for that fact that it’s a flourless cake, which is something I’ve not really experimented with before. Little did I know that it’d turn out to be the gooey-est, squidgy-est, richest and most intensely delicious cake ever! The kind of cake that shakes awake your taste buds, gives you a head rush and sends you into a food coma simultaneously! If you think you’re hard enough to give it a go you’ll need…

175g butter

175g dark chocolate (at least 70% cocoa solids)

5 eggs, separated

175g caster sugar

150g hazelnuts (with skins on) ground up in a food processor. I used a handheld stick blender, it was a bit messy but got the job done.

200g marmalade

Zest of 1 orange, grated finely

For the topping you’ll need…

75g dark chocolate (at least 70% cocoa solids)

75ml double cream

Zest of 1 orange, grated finely

Preheat the oven to 190 degrees and grease and line an 8 or 9 inch cake tin with greaseproof paper.

Melt the butter and chocolate together in a bowl over a saucepan of simmering water. Make sure the bottom of the bowl doesn’t touch the water.

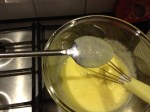
In another bowl, whisk the egg yolks and sugar together with a handheld electric beater or some muscle power and a good old fashioned whisk until they’re light and have a mousse-like consistency.

Once the chocolate and butter have totally melted, add in the ground hazelnuts, marmalade and orange zest and stir well.

The final component of the cake mixture is the egg whites. Whisk them until they form stiff peaks. You need to make sure there is no yolk in with your whites and that the bowl you use is spotlessly clean or they’ll never reach the right consistency.

Now to put everything together…fold the egg yolk and sugar mixture into the chocolate and hazelnut gloop until well combined. Then, in 3 batches, add the egg whites, folding them into the mixture very gently so as to retain as much of their light, fluffy, airiness as possible. 

Pour the finished cake mixture into the prepared cake tin and cook in the oven for 20 minutes, before turning the temperature down to 170 degrees and cooking for another 35-40 minutes. I tested mine at 35 minutes by inserting a skewer into the middle of the cake and seeing whether it came out clean…it didn’t, so I popped it back in for another 5 minutes and repeated this process at 5 minute intervals until the skewer came out clean and I was satisfied that it was ready..

Leave the cake to cool for a few minutes in the tin before removing it and letting it cool completely on a wire rack.

When it’s cool, it’s ready for icing. Melt the chocolate, cream and orange zest in a bowl over a saucepan of simmering water. As before, be very careful that the bowl isn’t actually touching the water.

Something went a bit awry for me at this stage…my icing was very thick! The recipe told you to put the cake on a serving place and to pour the icing over, letting it drip down the sides. My icing, however, was far from pouring consistency! A taste test told me that although it didn’t look quite right, it tasted amazing, so I decided to make the best of a bad situation and used a pallette knife to coat the top of my cake with what was in essence, thick, chocolate ganache…

I couldn’t wait the recommended 30 minutes to 1 hour for it to set and instead, put the kettle on, made a cuppa and got stuck in…

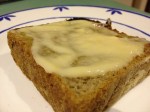
My eyes were bigger than my stomach and the flavours so amazingly intense that I savoured it very slowly and had to pause for a rest midway. It’s most definitely not a cake for the lily-livered…only serious chocoholics should venture forth!

Leave a comment

Filed under Uncategorized

Boozy lemon & honey pots with blueberries…

My friend invited me over to lunch last weekend and as is very commonly becoming the norm, I was tasked with making the dessert. I decided to mix it up a bit and shunned the idea of baking anything, instead experimenting with a delicious sounding recipe for lemon and honey pots with blueberries that I’d seen in the February 2012 edition of Sainsbury’s magazine…

They sounded great and apart from the slightly fiddly task of making candied peel, were pretty simple. They also gave me the perfect excuse to make use of the last of my home made limoncello (recipe here)…

To give them a go all you’ll need is…

Finely grated zest and juice of 1 lemon

2 tbsp clear honey

2 tbsp limoncello (optional but highly recommended)

300ml double cream

1 large egg white

4 tbsp blueberries plus extra to decorate (apparently frozen ones are fine)

and to make the candied peel you’ll need…

Peel of 1 lemon, sliced into thin matchstick-like strips

100g caster sugar

I recommend starting on the candied peel first to get the fiddly bit out of the way. Use a vegetable peeler to take the rind off the lemon, be careful to only take the yellow layer and not any of the white pith as it’s really bitter. Slice each strip into long matchsticks. Put them in a pan of boiling water and blanch them for 30 seconds before draining and setting aside. Then put 100ml of water in a saucepan along with the caster sugar and bring to the boil. Leave it to bubble away until it starts getting syrupy. Add the peel to the syrup and leave to boil away for 10 minutes. Now comes the tricky bit…remove the strands of peel from the pan and lay them on some greaseproof paper to cool. I used some kitchen tongs that were large and unwieldy, making the task quite messy and arduous. The recipe suggested using tweezers but that just sounded ridiculous. I’m not sure what the perfect solution is but feel free to freestyle your own method 🙂

Now you need to start making the main part of the dessert…

In a small bowl, mix the lemon zest, juice, honey and limoncello together.

In another bowl, whisk the cream until it forms soft peaks. Do the same with the egg whites in a separate bowl. Then tip one into the other and fold together gently so that you retain the light airiness of the egg whites.

Finally fold in the lemon and honey mixture and make sure it’s well combined.

Put a spoonful of blueberries in the base of 4 glasses. Spoon in the creamy, lemony mixture and put in the fridge to chill until you’re ready to serve them.

Just before serving top each pot with a few strands of candied peel and a few more blueberries. I also toyed with the idea of drizzling a tiny bit of neat limoncello on top but decided against it at the last minute…maybe next time.

They were the perfect end to what had been quite a substantial dinner…light, zingy and creamy all in one!

Leave a comment

Filed under Uncategorized

My annual Seville orange marmalade expedition in pictures…

Last year, I adopted a new annual tradition of Seville orange marmalade making. I’d never attempted it before last January and haven’t tried it again since, that is until last weekend. This is mainly because the Seville orange season is only a short one (Dec-Feb), which is now nearing it’s end. To be honest, I think it’s something about the transience of these gnarly, nobbly citrus fruit that appeals to me, along with the fact that they produce awesome, bitter sweet marmalade that really packs a punch! I like a full bodied, brash marmalade, Robinson’s Golden Shredless will never grace the shelves of my fridge!

I decided to use the same Nigel Slater recipe as last year (recipe here) but to double it to make a batch of 10 jars. Before even setting to work I had assigned homes to a number of jars and I wanted to make sure there was enough left to satisfy my own addiction!

In the space of a year I seemed to have forgotten the amount of work that goes into chopping the peel of 24 oranges and 4 lemons…

2 Hours later, there I was still (not so) patiently shredding the peel…

I got there in the end though, all be it with one arm that would have made Popeye proud!

The peel and juice went in a couple of pans to soak over night, along with muslin bundles packed with the pith, pips and general leftover orange goodies…

The next day I set to work boiling up the pots of peel until they were tender…

Before adding the sugar…

and bringing them to a rolling boil…

This part of the process is the most nervewracking and time consuming. I spent the best part of two hours watching my boiling pots, skimming scum from the surface and testing it every 10 minutes to see whether it had reached the optimum setting consistency, whilst marmalade laden condensation dripped down my kitchen windows!

The magical moment eventually arrived and I was delighted to have produced a vat of beautifully deep, dark, tangy Seville marmalade goodness…

Which I spooned into a motley crew of jars…

In the last couple of weeks I’ve been drawn into quite a few marmalade based discussions and have realised that preferences in consistency, density of peel and coarseness vary greatly from person to person. The beauty of making your own marmalade, apart from the pride you feel afterwards, is that you can make it exactly how YOU like it! Mine is getting better year on year…can’t wait ‘til next January’s attempt.

Leave a comment

Filed under Uncategorized

Rustic oatcakes…just add cheese, chutney, wine & friends

The other day I was perusing the shelves of Arjuna, Cambridge’s oldest vegetarian wholefood shop, when I came across a bag of fine oatmeal. Now, maybe I just need to get out more or maybe I just haven’t been looking very well, but fine oatmeal doesn’t seem to be widely available in the supermarket. I wasn’t even sure what I could make with aforementioned oatmeal but I was stupidly excited and bought it anyway.

It wasn’t long before the perfect recipe presented itself to me as did the perfect occasion. On Friday night I rushed home from work and set about making buttermilk oatcakes to take to a friends as an after dinner treat along with some Brie, St Agur and a pot of last years plum chutney given to me by another foodie friend…

The oatcakes were super easy to make and I loved their rustic look…better than the shop-bought, cardboard-like variety any day!

To make them you need…

200g fine oatmeal (if you’re lucky enough to find some or alternatively rolled oats, blitzed into a fine powder in a blender)

1/2 tsp bicarbonate of soda

2-3 tbsp sugar

1/2 tsp salt

50g unsalted butter

175ml buttermilk

Preheat the oven to 150 degrees and line a couple of baking trays with greaseproof paper.

Put the oats, bicarbonate of soda, sugar and salt into a large bowl. Cut the butter into small pieces and rub it into the dry ingredients with your fingertips until it has the texture of coarse sand and there are no big lumps left. It’s a lot easier if the butter is at room temperature. Stir in the buttermilk to form a gloopy paste.

Take a heaped teaspoon of the mixture at a time and roll into a ball, then place onto the prepared baking tray. Make sure the balls are about an inch apart before sprinkling them liberally with some more of the oatmeal. Now flatten each ball out into a disc about half a centimetre thick and don’t worry if they don’t look perfect…

Bake in the oven for about 25 minutes until they are firm in the middle and starting to go golden in colour around the edges. Leave them to cool on a wire rack. Now all that’s left to do is savour them with your fave cheese and a nice glass of red :)…

Leave a comment

Filed under Uncategorized

My first stint at FoodCycle Cambridge…

I recently discovered FoodCycle, an amazing nationwide organisation dedicated to tackling the issues of food waste and food poverty. They collect donations of surplus food from supermarkets and local businesses, which would otherwise be thrown away and, in their own words, ‘empower local communities to set up groups of volunteers’ to prepare healthy, nutritious meals on a regular basis for those in need in the community. However, FoodCycle isn’t exclusive, the food is offered to anyone and everyone, a £2 donation is welcome from those who can afford it. I had a look at the website for Cambridge’s FoodCycle hub, saw a call for volunteers on twitter and decided to offer my services!

So, yesterday morning I defrosted my bike saddle and headed to the kitchens of St Pauls Church in Cambridge to meet Jen, the lady leading the cooking team for the day. I was the first to arrive and found Jen unpacking that days donated food. The food is collected the night before, then the coordinator devises a menu using the available ingredients. In this case, when life gives you a huge pile of leeks, an insane amounts of bananas and a selection of root vegetables, you make…

After a cup of tea and a chat with the rest of the food prep team, amongst whom, were fellow Cambridge food bloggers Miss Igs and Sue Flay of The Secluded Tea Party, we set to work…

The soup was made up of carrots and broccoli…

with a dash of cream and a sprinkle of paprika…

I was in charge of the main course along with Miss Igs. We were using Hugh Fearnley-Whittingstall’s recipe for roasted pale roots crumble as a starting point but throwing in a bit of artistic licence on ingredients. We chopped everything into similar size pieces and put them into large baking trays…

Then made up a dressing of honey, mustard, oil, rosemary, salt and pepper and got our hands dirty to make sure everything was well coated…

We then popped them in the oven for 45 minutes, gave them a good old mix up and popped them back in for another 20 minutes…

At which point they were looking and smelling delicious…

Miss Igs toasted and chopped some walnuts, which we sprinkled over the roasted veg along with a drizzle of single cream…

We then covered the whole tray in a crumble topping made of oats, grated cheese, breadcrumbs and thyme…

After 20 more minutes in the oven it looked like this…

We served it up with cheesy leeks…

Apparently bananas feature quite regularly on the FoodCycle menu due to the fact that they can become overripe quite quickly making them unsalable. Jen encouraged us to come up with an idea for pudding as banana based inspiration was running a little dry. I’d stashed a recipe for caramelised banana upside down cake in my memory banks but for the life of me couldn’t remember where I’d seen it. But with a little help from Uncle Google I found this recipe. Emily, who was in charge of pudding chopped the bananas, laid them in the bottom of a baking tray and drizzled them with a mixture of melted butter and dark brown sugar…

She made up a banana sponge batter, which she poured over the top…

It then went into the oven and we waited nervously for 40 minutes to see whether our experiment had worked. Making something like this wouldn’t usually be so nervewracking but scaling a normal recipe up to this huge size is a bit of a new experience for me. We needn’t have worried though, it came out of the oven smelling delicious with gorgeous puddles of caramel seeping up the edges of the tin…

The bananas were gorgeously sticky and sweet and the delicately spiced sponge was light and moist…

I think we can say that it was a great success…

When all the cooking was done and dusted it was serving time. A second team of volunteers had the dishing up and serving covered and we were given the chance to sit down with the FoodCycle beneficiaries and enjoy the fruits of our labour…

I thoroughly enjoyed my FoodCycle experience, not only did I get a chance to meet like minded foodies, but I got to spend a morning doing what I love best and all for a good cause! I’ll definitely be signing up for another session soon. If you’re interested in volunteering there’s more information on their Facebook page here.

Leave a comment

Filed under Uncategorized

Ditch the detox and get baking…apple, walnut & custard cake…

One of my favourite Christmas presents was my ‘Short & Sweet’ recipe book by Dan Lepard (or Def Leppard as my Mum has coined him)…

His recipes in the Guardian magazine have had my mouth watering on many occasions and I’ve already attempted his clementine and oat muffins

his herb roti, which I served up with a curry made from Christmas leftovers…

and his sticky lemon and poppy seed cake

However, my first choice from the many ‘must bake’ items, which I’ve earmarked, was this amazing apple, walnut and custard cake…

There are three main stages to this cake, so not the quickest of bakes but well worth the effort!

Preheat your oven to 180 degrees and line a 20cm cake tin with greaseproof paper.

First up you need to make the custard. You’ll need…

175ml milk

2 tsp vanilla extract

50g light soft brown sugar

2 tbsp cornflour

1 medium egg

Whisk all of the ingredients above, together in a saucepan until smooth. Bring to the boil, whisking continously until it’s thick. I found that the turning point came about very suddenly so don’t get complacent, just keep whisking! Once it’s reached a very thick consistency, spoon it into a lightly buttered bowl and chill until firm. 

Next up you need to prepare your apple and walnut filling. You need…

50g light soft brown sugar

3-4 dessert apples, peeled, cored and quartered

75ml brandy

75ml water

75g walnuts, chopped

Place all of the ingredients above in a frying pan and cook over a high heat until the liquid has evaporated. Then leave to cool whilst you make the cake batter. For that you’ll need…

100g light soft brown sugar

75g unsalted butter, softened 

2 eggs

50g plain flour

1 1/2 tsp baking powder

Beat the sugar and butter together with an electric or handheld mixer (or a lot of elbow grease) until light and smooth. Beat the eggs in one at a time until thoroughly incorporated. Finally stir in the flour and baking powder with a spoon. Chop the set custard into chunks and fold into the cake batter being careful not to break it up. Now, tip it into the prepared cake tin… 

and finally, place spoonfuls of the apple and walnut mixture on top. Swirl it slightly with a teaspoon to make sure it’s bedded in well. Then pop it into the oven for about 50 minutes…

At which point it will look like this…

Serve it warm, drizzled with maple syrup and a good dollop of creme fraiche…

The apples retain a slight crunch, the walnuts are beautifully caramelised and brandyfied and if that weren’t enough, you’re rewarded with fantastic pockets of vanilla laden custard…sheer heaven on a plate! ditch the detox and get baking!

Leave a comment

Filed under Uncategorized

Last week I saw ‘Eat Like a Girl’s’ recipe for blood orange and rhubarb curd in the Evening Standard and stored its existence in my memory banks until the weekend, when I happened upon blood oranges for sale on the market. I rushed home and started preparing only to discover that I’d been duped and sold a dud blood orange (read ordinary orange). I decided to just plough on anyway and although my finished curd was fairly insipid in colour, I am happy to report that it tasted divine…less tart than lemon curd (obviously) but with a great rhubarb tang. I passed up the meringue pie in favour of slathering it on thick slices of toast! perfect!

Leave a comment

10/01/2012 · 10:00 am

Homemade Christmas moonshine…

I know Christmas has passed but I couldn’t withhold the most successful of my homemade Christmas gifts…both alcohol based!

First up I made a litre of liquid Christmas pudding by infusing vodka with all the typical ingredients that you’d associate with the traditional dessert. I discovered the recipe on the Domestic Sluttery website here. It was unbelievable easy and the only effort required on my part was in chopping up the fruit to bung in a large bowl along with the vodka…

and then to stir it up and give it a bit of love every day…

sampling every now and again of course 😉 …

After a week, I used a piece of muslin and a funnel to decant it into a pretty bottle and hey presto…

My other seasonal concoction was a rather large batch of Limoncello, an Italian lemon liqueur, which originated from Southern Italy. It took slightly longer to prepare but was equally as easy. The recipe I used was from the BBC Good Food website here.

Basically all you need to make 2 litres is…

5 unwaxed lemons

1 litre of vodka

750g caster sugar

700ml boiling water

and some large receptacles for brewing your limoncello up in!

Simply zest your lemons, being careful not to get too carried away as you don’t want to include the bitter white pithy layer, just the bright yellow outer zest!

Put the zest in a large jar and pour over the vodka, seal and leave for a week, giving a gentle shake of encouragement daily…

After a week, put the sugar in a bowl and pour over the boiling water. Stir until it has fully dissolved. Without thinking I used golden caster sugar, which gave my limoncello a deeper colour than if I’d used the white variety…no harm done!

Add the sugar syrup to the vodka and lemon peel and leave to infuse for another week…don’t give up on the daily stir of encouragement…

Appearance-wise nothing much happened but the taste developed beautifully as time went on…

After a couple of weeks I strained my limoncello into pretty bottles and there you have it…

Limoncello is best served straight from the freezer as a digestif and it’s ridiculously delicious!

At this point I’d like to wish anyone who reads my inane food related ramblings a very Happy New Year! I for one can’t wait to see what 2012 brings…hopefully many more baking exploits and delicious meals! 🙂

1 Comment

Filed under Uncategorized

My Christmas in pictures…Polish, English & a bit of Vietnamese…

I love the fact that my family has, over many generations, developed and honed our individual take on the traditional Christmas. There are some traditions that we stick to religiously and some stranger traditions that have, over the years, just become the norm. However most, if not all, of them revolve around food. 

As you may surmise from my surname, I’m half Polish. Every year my family celebrates Wigilia (Polish Christmas) on Christmas Eve. I wrote about it here last year and although the menu pretty much stays the same I thought I’d share this year’s pictures with you along with some others.

We start Wigilia with a drink of Wisniowka (cherry vodka) and a toast to all family members past and present who aren’t with us…

Then we sit down to barszcz (beetroot soup) made by my Dad in accordance with his secret recipe using beetroot from our garden…

and uszka (mushroom filled Polish ravioli) made by my fair hands…

I blogged the recipe for these little beauts last year here and even managed to get them a mention on the BBC News website.

I prepare the uszka in advance but boil them up briefly on the night to reheat them and then serve them floating in the jewel coloured barszcz…

The next course is a selection of cold dishes including pickled herrings…

along with Polish bread, gherkins and pickled mushrooms…

Then we have fish loaf, made with cod, coated in breadcrumbs and baked until golden in the oven…

We eat this with roast potatoes, vegetable salad and homemade mushroom and tomato sauces…

For dessert we have kompot, a dried fruit salad soaked in earl grey tea and orange juice…

and finally a selection of Polish cakes…

Breakfast on Christmas day in our household ay sound slightly off the wall but for some reason, has always been half a grapefruit… 

Followed by sausages, fresh, soft, white bread and lashings of gravy…

For lunch our main course is always a full turkey dinner with all the trimmings but it’s my job every year to decide on and prepare the starter, which this year was far from traditional.

I decided to use some of the skills that I’d learnt from Uyen of Leluu Supper Club when I helped her out earlier in the year. I chose to make Sai Gon Summer Rolls and despite some teething problems I think I did pretty well…

You can find Uyen’s recipe here.

The process of making these delicate, fragrant rolls starts by poaching pork belly, which is then cut up finely to go inside the rolls…

along with rice vermicelli, mint, coriander, lettuce and king prawns…

(I had to use more basic ingredients as I wasn’t able to find cockscombe mint, Vietnamese chives or Perilla but they still tasted divine)

Rice paper circles are soaked until pliable and then used to gently wrap up the filling ingredients like so…

They are accompanied by a delicious hoi sin based dipping sauce…

They were a huge hit with my family and the the perfect intro to our Christmas dinner. The food fest that is Christmas was incessant, many delicious morsels were consumed, belts loosened and dishwasher’s filled in a constant cycle…I love this time of year!

I received some exciting presents including…

and…

and I’ve already started trying out new recipes, which will no doubt be blogged very soon…watch this space!

Leave a comment

Filed under Uncategorized

There’s still time to make some Christmas granola…

Recently, whilst flicking through one of my Mum’s food magazines a recipe for Christmas granola jumped out at me. I whipped up a batch last weekend and was really pleased with the jewel-like, crunchy, delicious outcome…

It’ll take pride of place in the homemade hampers that I’m gifting my family members with this year along with the caramelised red onion chutney and balsamic pickled shallots, which I’ve blogged recently.

All you need to make about 2 litres of the stuff…

500g rolled oats

1 x 90g pack sunflower seeds

1 tsp ground cinnamon

3 tsp ground allspice

150g maple syrup

100g light brown sugar

300g mixed nuts, roughly chopped

750g mixed dried fruit, roughly chopped (I used dates, apricots, sultanas and these amazing crimson raisins, which I found in Sainsburys)

100g dessicated coconut

Preheat the oven to 180 degrees. 

Put all of the ingredients except for the dried fruit and coconut into a large bowl and get your hands dirty mixing it all together and making sure that everything is coated in syrupy, sugary, spicy goodness.

Pour the mixture out onto 2 to 3 baking sheets and bake for 10 minutes. The added bonus is that it’ll make your kitchen smell absolutely divine. When the time’s up, take the trays out and shake them up, turning the mixture over before popping back in the oven for another 10 minutes.

Whilst the oaty mixture is in the oven you can mix the dried fruits and coconut together in a bowl ready for later.

Remove your granola from the oven and leave it to cool…

Then simply mix everything together and decant it into pretty jars…

Use your artistic license to cover the lids and/or add labels…

Easy as pie…or granola!

Leave a comment

Filed under Uncategorized