Retro coconut cake with raspberry jam & coconut buttercream…

Today I made this little beauty…

I’ve been meaning to share this deliciously retro sounding recipe for ages. I found it in one of my Good Food 101 Cakes and Bakes book and tried making it for the first time a couple of months ago. It’s so delicious that it’s found its way firmly into my repertoire of faves.

In making it, I also learnt an incredibly handy skill…how to make coconut cream! I discovered this, whilst scouring my local shops for coconut cream in a last minute panic, but to no avail! Every single shop, however, had boxes of creamed coconut (a solid white block made from pure coconut) so with the help of a bit of on the spot googling I learnt that all you need to do is dissolve 75g creamed coconut (grated) in 100ml of hot water and stir until smooth. Hey presto! These quantities also, luckily, make exactly the amount of coconut cream that you need for this recipe!

All you need is…

175g unsalted butter

175g caster sugar

175g self-raising flour

1.5 tsp baking powder

3 eggs

50g dessicated coconut

2 tbsp coconut cream (remember the handy hint above 🙂

For the coconut buttercream icing you need…

280g icing sugar

100g unsalted butter

3 tbsp coconut cream

and finally half a jar or so of raspberry jam for sandwiching.

Preheat the oven to 160 degrees (180 degrees if it’s not a fan) and grease and line the bases of two 8 inch round cake tins. If you find lining cake tins a hassle you should read this handy ‘Kitchen How To’ from Miss Igs.

Mix the butter and sugar together with a handheld electric mixer for a few minutes before adding the eggs, flour and baking powder. Beat well for 2-3 minutes until smooth. Stir the dessicated coconut and coconut cream in gently.

Divide the mixture evenly between the two tins and pop in the oven for about 25 minutes until golden and firm to the touch. Insert a skewer into the centre of the cake to test it, if it comes out clean, it’s ready!

Leave to cool for a few minutes, then loosen the edges and remove the cakes gently from their tins and put them on a wire rack to cool completely.

To make the buttercream you just need to sift the icing sugar into a large bowl and beat in the butter and coconut cream until smooth.

Spread half of the buttercream on top of one of your cakes, followed by a layer of raspberry jam on top of that, or if you fancy putting the jam on first followed by the buttercream it’s your call!. Either way, gently lower the second cake on top and finally dollop on the remaining buttercream and spread and swirl to you hearts content until you’re happy with the finished product…

Then cut yourself a huge slice and get stuck in…

Leave a comment

Filed under Uncategorized

A very summery spiced tomato & red pepper chutney

Afternoon tea just wouldn’t be complete without a nice array of finger sandwiches. I make mine using bread from my local baker (Donaldsons on Mill Road), I make sure I’m not stingy with the salted butter and I most definitely cut off the crusts :). I like to keep the fillings simple and classic…ham & wholegrain mustard, cucumber & cream cheese, egg mayonnaise & cress and cheese & homemade chutney.

My next afternoon tea guests have requested cheese & chutney as one of their fillings and what with it also being the start of the British tomato season, I thought there was no better time to get chutney making!

I felt quite refined this morning as I hopped on my faithful old bicycle (Sally the Raleigh) and pedalled across town to peruse and select the perfect ingredients for my chutney from the market. I was spoilt for choice and came back with this bountiful crop of tomatoes still on the vine and huge red peppers…

I’d found this recipe for spiced tomato and red pepper chutney a while ago in an ancient copy of the Sainsburys magazine. It was very popular with my family and friends when I made it before so I thought I’d give it another go. I love how it retains the vibrant colours of the fresh ingredients…

and…it’s amazingly easy to make. As with most chutneys all you need is time and patience 🙂

To make about 1.5 litres (approx 5 jars) you’ll need…

1 tsp cumin seeds

2 tsp coriander seeds

4 tbsp olive oil

2 large onions, diced finely

4 red peppers, cut into approx 1 cm dice (I like my chutney chunky but if you like yours finer feel free to use a food processor to do the chopping)

1.4kg ripe tomatoes, cut into approx 1 cm dice

8 cloves garlic, crushed

4 tbsp ginger (a chunk of ginger the size of about 4 wine corks), grated

8 tbsp soft brown sugar or demerara sugar

8 tbsp red wine vinegar or cider vinegar

Grated zest and juice of 4 oranges

1 tsp dried crushed red chilli flakes (optional if you like your chutney with a kick)

Lightly crush the cumin and coriander seeds in a pestle and mortar and toast them in a dry frying pan until they start to release a gorgeous aroma, then remove them from the heat and set aside.

Pour the oil into a large pan and add the diced onions and toasted spices. Cook for a few minutes but try not to brown the onions, just soften them slightly.

Now add all of the remaining ingredients…

and bring to the boil. Once it’s bubbling away, turn it down and simmer until it thickens. Make sure you stir it frequently so that it doesn’t stick to the bottom. The test to see if your chutney is thick enough is to drag your spoon down the centre of the pan, if the divide in the chutney remains, you’re done! The recipe I was following said that it would take 30-45 minutes for it to reach this stage but mine took considerably longer, hence the need for time and patience 🙂

But eventually it’ll look a little something like this…

at which point it’s ready to decant into sterilised jars (Find out how to sterilise your jars here)…

Finally, pour a tablespoonful of olive oil on top of the chutney and screw the lids on tight. Once sealed, your chutney will keep for months. Once you crack into a jar just make sure you keep it in the fridge.

Here’s my motley batch of summery spiced tomato and red pepper chutney…

The perfect addition to a delicious mature cheddar sandwich!

Leave a comment

Filed under Uncategorized

If you ever happen to be in Tunbridge Wells, I highly recommend that you visit Juliets. It’s a gorgeous cafe with a great savoury menu consisting of a daily changing selection of salads and sandwiches as well as a vast selection of tempting cakes!

I was won over by their baked squid stuffed with parmesan, sourdough breadcrumbs and basil pesto, which I had with bulghar wheat pilaf with perry marinated sultanas, roasted carrot, onion, coriander and pink peppercorns and tricalore bell pepper chop salad with spring onion, rocket, sesame, Dijon and cider vinegar and of course I finished my meal off with a huuuge slice of carrot cake! 🙂

Leave a comment

21/06/2012 · 1:54 pm

Plate Lickers Supper Club #2 date announced…

We enjoyed our first Supper Club experience so much that we’re back for more!

Ivana & I have been busy planning and have found an exciting new secret venue to house the next Plate Lickers Supper Club, which I can now announce will take place on Friday 13th July! (luckily neither of us are superstitious 😉

This time we’ll be serving up a 5 course Middle Eastern inspired menu including a welcome drink.

A supper club is a very sociable way of dining with everyone sat together on big table and sharing dishes so feel free to come with friends or alone, either way you’ll be warmly welcomed and made to feel at home!

The evening will start at 7.30pm with a welcome drink and canapes and we will begin the meal at 8pm.

Places are limited so to reserve yours just drop an email to platelickersanonymous@gmail.com with your names and any allergies or dietary requirements you have.

There is a suggested donation of £30 and we invite you to BYO along with a big appetite.

Our top secret location in central Cambridge will be shared with attendees just a couple of days before the event.

If for any reason you need to cancel, please let us know as far in advance as possible so that we can offer your place to somebody else & save on food waste.

You can see my write up of our last event here and can follow the chat on twitter #platelickers 

Leave a comment

Filed under Uncategorized

Veg box enlightenment…courgette, feta, & mint fritters…

I recently received my first organic veg box delivery from Riverford Organic. I’ve been wanting to try out a veg box scheme for a while and just haven’t seemed to be able to get organised enough to do it. I eat a hell of a lot of fruit and veg but seem to get stuck in a bit of a rut and cook the same things over and over. I thought that the mystery and pot luck aspect of a veg box delivery would encourage me to be more adventurous with my meals. 

It felt a lot like Christmas when this bountiful box of goodies arrived on my doorstep…

In amongst the veggies was this unidentified greenery…

I posted a photo on Twitter and was promptly informed that they were broad bean tops, which are usually pinched out at this time of year to minimise the risk of black fly infestation in broad bean plants. It was recommended that I pan fry them with some garlic and lemon juice, add them to a risotto or simply steam them and serve with a drizzle of olive oil. 

After using the powers of google for inspiration I came up with my first veg box meal idea…courgette, feta & mint fritters with steamed broad bean tops…

They were amazingly simple to make and in my mind there are no hard and fast rules…if you don’t have mint, don’t add it, if you have lemon but no lime use that instead. The recipe below can be used as a guide but feel free to freestyle according to your own tastes! 

To make 4, which would be enough to serve two as a starter or one hungry person as a main meal you will need…

1 large courgette

1 clove of garlic, crushed

Approx 10 sprigs of mint, chopped

Zest of half a lime

100g feta cheese, chopped

1 egg, beaten

2 tbsp plain flour

Lime juice to serve

Start by grating the courgette. Squeeze it between your hands to get rid of as much liquid as possible and put into a large bowl. Add the remaining ingredients except the lime juice and mix together to make a sticky mixture…

Heat some oil in a frying pan. Add your mixture to the pan, making 4 fritters and flattening them down slightly. Cook for a few minutes on both sides until they have taken on some colour and are cooked through and there you have it…

The broad bean tops were a simple but tasty accompaniment and the whole dish was finished off perfectly with a squeeze of lime. Since discovering this dish I’ve already recreated it twice and will most definitely be making them again…I appear to be a creature of habit.

I’m already looking forward to my next veg box ‘Ready, Steady, Cook’ experience! 🙂

Leave a comment

Filed under Uncategorized

An evening of swine & dine…

Last week my belief in Cambridge as a foodie destination increased tenfold. I think it will always remain in London’s shadow to a certain extent but with coffee scene really taking off, new supper clubs and pop up events being set up and the standard of food increasing across the board from pubs to fine dining establishments, we’re heading in the right direction. Being one of the food obsessed inhabitants and part of the Twitter community, I’m very aware that Cambridge folk definitely have the hunger for more!

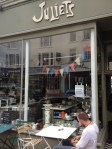
I was very lucky to secure a place at a ‘Flying Visits’ event hosted by Alimentum and organised by Dingley Dell Pork. This was the 3rd of these special events, celebrating all things pig! I only discovered it a mere 24 hours beforehand and had no idea what to expect…

I arrived at Alimentum and was promptly welcomed with this exciting looking cocktail…

It was created by Joe Tivey of 12A Member’s Club and was entitled ‘If Pigs Could Fly Across the Pond’ which hints at it’s UK and US inspirations. It was made with Four Roses Bourbon that had been infused with maple syrup and smoked bacon (they even got pig into the drinks, you just wait until dessert!) and then smoked with hickory and applewood smoke. It was served on the rocks with a squirt of Aspalls Cider foam and a spoon. I had absolutely no idea how I was supposed to tackle it, so I tucked away my pride and asked someone. Apparently the spoon was there to taste the Aspalls foam but after that we were encouraged just to sip as normal. I’m not really a Bourbon drinker, but this combination worked very well indeed! 

Not only did we have a 5 course meal to look forward to, the team had also devised a wine to match the each course…what a treat!

There were boards of canapés doing the rounds…

Cider jelly and smoked bacon on toast, shortcrust pastry topped with pulled pork, red onion chutney & apple puree and how could anyone resist a delicious little quail scotch egg! (served with Perlette d’Abbaye Brut, Rhone Valley, France, NV). They were the creations of James Drury and Rachel Speak, two students from the Colchester Institute, who had won the chance to create and serve their canapés as part of the ‘A Passion to Inspire’ competition

Glasses were clinked and our attention was directed at Mark from Dingley Dell Pork, who introduced the evening. We also heard from Bob Waller of Freedom Foods and received a very interesting butchery master class from Direct Meats

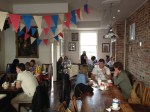
I eat a lot of pork but if you’d presented me with a whole animal and asked me to cut it up into well known joints, I’m ashamed to admit that I wouldn’t have much of a clue. Luckily there weren’t any squeamish people in attendance, we all remained upstanding and were ushered through to the restaurant for dinner.

I was sat on a table with Freedom Food afficionado, Bob Waller, and spared no time in grilling him on the subject. However, I took a few minutes first to crack into these delicious mini sage loaves and delicate milk loaf…

I find the labelling of meat in supermarkets a bit of a minefield and managed to put my foot in my mouth straight away by asking Bob if Freedom Foods classification was the step down from free range. Bob explained that Freedom Food status can be awarded to meat across the board from Supermarket own brands to free range but by having the Freedom Foods symbol on their packaging it means that the farmers comply with the minmum levels of animal welfare set out by Freedom Foods. He likened it to Fairtrade and used the analogy of fairtrade chocolate, which could vary from Cadbury’s to Thornton’s or Co-op.

So enough of my (w)offal (sorry I couldn’t resist a meat related pun). The first course presented to us was crispy pig’s head with garden vegetable salad and almonds by Eric Snaith of Titchwell Manor (served with Saint Mont Blanc, Andre Daguin, Gascogny, France, 2008)

We found out that the white blobs were almond oil balls, and had a very unique texture. I loved this dish, the pigs head was unbelievably tasty and the salad so fresh and vibrant. 

Next we had pork belly with carrots, liquorice, sweet cicely and lemon verbena by Russell Bateman, Colette’s at The Grove (served with Pinot Gris, Domaine Materne Haegelin, Alsace France, 2010 – an amazing wine, it won the place of my favourite for the night!)

Fresh liquorice was grated onto our dishes at the table, which I thought was a great finishing touch! We identified the lemon verbena to be the white powder on top of the pork…on it’s own it was very unusual but eaten with all of the other components it really came alive.

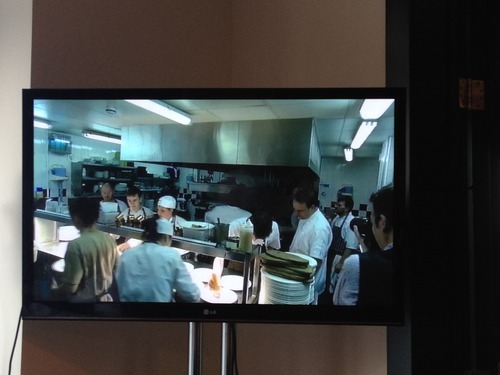
During the meal there was live footage being streamed from the kitchen onto televisions in the restaurant so we could see exactly what was going on…

The next course was  called ‘Ham, Egg and Cheeks’ by Ross Pike and Madalene Bonvini-Hamel from The British Larder, Suffolk, who hosted the last Flying Visit (served with Toscana Bianco IGT, I Veroni, Tuscany, Italy, 2011)


I’m not usually a great fan of savoury jelly but was pleasantly surprised by how tasty it was. There were nuggets of black pudding in amongst the pigs head and knuckle terrine and the pea shoots as an accompaniment were amazing!

Next up was Alimentum’s owner Mark Poynton’s creation…hay smoked pork loin with turnip, apple and jack by the hedge (served with Huaquen Reserva, Pinot Noir, Curico, Chile, 2009)

I made the mistake of diving straight in for a taste of the lurid green concoction, which as suspected was the jack by the hedge. It was incredibly bitter, but as with the previous dish, when eaten with all of the other components, worked really well! No sooner had my neighbour asked the waiter to describe jack by the hedge, when Mark himself appeared at our table to describe it as a herb not unlike clover but on a longer stem, easily forageable in the English countryside. It’s true…you learn a new thing everyday!

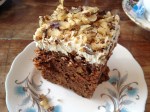
Predictably perhaps, I’d been really looking forward to the dessert of peanut, strawberry and crispy pork shoulder created by Michelle Gillott, chocolatier (served with Coteaux Du Layon, Vielles Vignes, Loire Valley, France, 2009)

The pork shoulder had been marinated in fish sauce then left to dry before being deep fried and placed atop the delicious strawberry sorbet.

Every single course had been so well thought out by a very talented team of chefs…

It was a great evening and a true celebration of everything great about pigs and pork! A high standard has been set and if we can manage a few more foodie events like this, London had better watch out…Cambridge is hot on it’s heels!

To keep up with future events you can follow Flying Visits on Twitter @FlyingVisits

Leave a comment

Filed under Uncategorized

Afternoon Tea…we won’t let this rubbish weather stop us!

It appears that the sun is being a little shy in getting his hat on this year, but that’s not going to stop us hardy Cambridge folk having some afternoon tea fun! I’ve blogged previously (here) about my exciting collaboration with Cambridge Hen Party and Let’s Go Punting as their afternoon tea provider. 

This weekend, despite some sketchy weather conditions, a bride to be and her hens tucked into afternoon tea in the sheltered haven of the gorgeous converted barn at The Punter on Pound Hill in Cambridge. It was the perfect setting, I absolutely love their collection of mismatched furniture and quirky decor. I took a few minutes before the ladies arrived to take a few snaps…

I got another chance to give my collection of mismatched crockery an outing and made sure no place setting was the same 🙂 …

I served up delicate finger sandwiches, mini Devonshire scones with jam and cream, gooey brownie squares…

and luscious lemon drizzle cake with lemon curd buttercream icing…

These mini milk bottles are so adorable I couldn’t resist serving the milk in them…

to accompany tea in my favourite teapot collection…

If you’re interested in booking an afternoon tea and punting package drop Caroline an email on info@cambridge-hen-party.co.uk for hen parties or info@letsgopunting.co.uk for non hen parties (boys, you are by no means excluded from enjoying afternoon tea :).

Leave a comment

Filed under Uncategorized

Banana loaf experiments & my social media embargo…

This weekend I’m doing something I haven’t done for a very long time…I’m going on holiday. I’m not going anywhere tropical, just an hour or so down the road to a country cottage near to where a good friend is getting married, but I intend to fully sign out from the (cyber) world and attempt to leave my email account(s) unchecked, my Twitter account(s) abandoned and my Facebook status un-updated 🙂 This may not sound like such a big thing, unless like me you are a social media/internet addict! Last year my boss bought me Grace Dent’s book ‘How to Leave Twitter: My Time as Queen of the Universe and Why This Must Stop’ it had me laughing out loud, not only at her wit and her insightful ponderings on others’ Twitter behaviour but at the depths of her Twitter addiction. A year on, I wonder what my reaction would be if I read it again and whether I would cringe at the similarities to my own social media tendencies 🙂 But hey ho, as a parting shot, I thought I’d post a blog about this week’s baking adventures. 

The monthly Book and Bake club I go to had rolled around again, this month we were meant to have read Crooked Letter, Crooked Letter by Tom Franklin and have baked a Mary Berry recipe. I failed in a big way on the reading front and didn’t even get as far as buying the book, so to compensate, I baked 4 Mary Berry banana cakes! This may seem a bit excessive but I saw it as a great excuse to a) use up some bananas left over from my latest stint volunteering at FoodCycle Cambridge and b) trial some new recipes.

Here’s the line up… (left to right – banana & honey tealoaf, banana & chocolate chip loaf, gluten free banana, date & walnut loaf, banana & cherry tealoaf)

and again… (clockwise from top right – gluten free banana, date & walnut loaf, banana & cherry tealoaf, banana & honey tealoaf, banana & chocolate chip loaf)

I found all of the recipes online. First up was the banana & chocolate chip loaf 

My chocolate chips gravitated to the bottom of the cake, which however annoying, wasn’t detrimental to the taste. It was amazingly moist and great for the sweet toothed among us 🙂

Next up was the banana & honey teabread, which I discovered on The Goddess Kitchen’s blog…

Now for some reason, my banana & honey teabread didn’t turn out anything like Maria’s pictures. It was the squishiest cake/pudding I’ve ever made and even though I cooked it for 1 hour 30 minutes, longer than the recipe recommended, it showed no sign of setting so I gave in and took it out of the oven, turned my back for a second and when I looked round it had sunk! I was calling this one the failure cake, however, it turned out to be the favourite for a lot of the people who tasted all four! I have a feeling I was over generous with my honey measurements…here’s to happy accidents 🙂

The next one was a bit of an experiment for me as I’ve never ventured into gluten free baking. I stocked up on gluten free flour and baking powder…

and set about making a gluten free version of this banana, date & walnut loaf, which I found on this blog ‘Gardening for Lawyers’

It wasn’t as squidgy as some banana breads I’ve made and eaten in the past but it was absolutely delicious and definitely my favourite! I’ve since made another 2 loaves…

The last experiment was Mary’s banana, date & cherry loaf, which I found posted here on an online forum (see, the internet is a magical thing:)…

It was a classicly yummy banana bread but in my opinion would have benefited from more cherries. Bright red, glace cherries are a guilty pleasure of mine! 

The Book and Bake ladies soon forgave my book reading failure when they found out that they had 4 cakes to try instead of 1!…

So, that’s it from me for at least 4 days…if you see/hear anything from me, I have failed my social media embargo experiment!

Leave a comment

Filed under Uncategorized

Argentinian alfajores biscuits…

My baking addiction makes me a pretty good person to live with…the kitchen’s always sparkling and there is never a shortage of cake around. The only downside for my long suffering housemates is that they have to wait until whatever I’ve baked has been sufficiently photographed before they can tuck into it and when I eventually let them, I ask them to provide me with comprehensive feedback…so I guess it works both ways! My housemate’s girlfriend, Dani, has an amazingly sweet tooth so is a prime target to try new recipes out on. She’s Argentinian and was telling me recently about a traditional Argentinian biscuit called alfajores, which are light shortbread biscuits, sandwiched together with lashings of dulce de leche and rolled in dessicated coconut. They had me intrigued and sounded a bit like a hybrid snowball/wagon wheel but classier. So, I set out, with the help of the world wide web, to find out more about alfajores and was determined to have a go at making them!

I found a plethora or recipes on the internet and after browsing a few decided to follow this one from Lori Lange (aka Recipe Girl). The biscuits are made using, amongst other things, egg yolks and corn flour which act to make them both rich and light. They also contain cognac and lemon zest, which gave them an awesome flavour! Here are the finished articles…

After chilling the prepared biscuit dough, I cut out and placed the pleasingly perfect circles on a baking tray…

The recipe said to bake them for 12-15 minutes and that they should be dry but not brown…

Dani’s feedback on my alfajores was very positive. She said that they were very authentic but she also told me that her Mum bakes them for literally 5 minutes until they are just set and still retain a slight ‘cookie dough’ texture. I think I’ll take that on board for next time, as they were delicious but slightly dry.

I think next time I could be a tad more generous with the dulce de leche too. I personally can’t get enough of the stuff and would love to have a go at making my own! I’ve added it to my ‘to bake/make’ list.

All in all, my alfajores were a success, they didn’t last long at all in my kitchen, which says it all 🙂

Leave a comment

Filed under Uncategorized

Delicious Polish Pierogi…

I recently made a mammoth batch of 180 pierogi for the recent Plate Lickers supper club

Pierogi are basically Polish ravioli and can have a variety of different fillings. They’re a little bit fiddly to make first time around but in my opinion are well worth the effort involved. After making 180 I was a total pro :). However, I’d recommend that you stick to a smaller number to begin with. The recipe below will make enough dough for about 60 pierogi.

Start by making your filling so that it has time to cool before you use it to make the pierogi. 

I found this website, which gave me loads of ideas for fillings. I decided to go for sauerkraut, carrot and sour cream to start with…

To make enough for 60 pierogi you need…

1 small onion, finely diced

300g sauerkraut (you can buy this in packets or jars at most Polish shops or large supermarkets)

3 carrots, grated

3 tbsp sour cream

Put a knob of butter in a frying pan and fry the onion until soft. Add the drained sauerkraut and carrot and cook on a low heat until the carrot is soft. Be careful not to have your pan too hot, you don’t want your sauerkraut to brown. Add salt and pepper to taste and remove from the heat. Stir in the sour cream and set aside to cool.

I also made my favourite mushroom filling, which is one I use every year to make uszka at Christmas time (blogged here)…

To make enough for 60 pierogi you need…

60g dried porcini mushrooms

Approx 10 chestnut mushroom, chopped finely

1 small onion, finely diced

1 egg

3 tbsp fresh breadcrumbs

Pour boiling water over the porcini mushrooms and leave to soak until they are soft. Remove them from the water being careful not to disturb any grit that may have settled at the bottom of the bowl, and chop finely.

Put a knob of butter in a frying pan and fry the onion until soft. Add the fresh and rehydrated porcini mushrooms and cook for a few minutes until soft. Add salt and pepper to taste. Remove from the heat and pour into a bowl to cool for a few minutes before adding the egg and breadcrumbs to make a thick gloopy filling. It looks pretty nasty but I guarantee, tastes delicious!

The final filling I tried was potato, cheese & caraway seed. To make it you need…

5 red potatoes

1 small onion, finely chopped

250g curd cheese (can be found in the Polish section of large supermarkets and has the texture of dried out cottage cheese)

2 tsp caraway seeds

Boil the potatoes in salted water until soft, drain and mash them well. Stir in the cheese, caraway seeds and salt and pepper to taste. Set aside to cool.

To make the pierogi dough you need…

3 cups plain flour

1/2 tsp salt

1/4 cup sour cream

1 egg 

1 cup water

Put the flour and salt in a large bowl and make a well in the centre. 

Beat the egg with the sour cream and pour into the well.

Roll up your sleeves and get messy, bring all of the ingredients together with your hands. Add a small splash of water at a time until all of the ingredients come together to make a dough thats soft but not sticky. If you overdo it with the water, just add a bit more flour until you achieve a good consistency.

Wrap the dough up in clingfilm until you are ready to use it so that it doesn’t dry out.

It’s quite a stretchy dough, which makes rolling it out a bit tricky. I recommend only working with half of the dough at a time. Dust your surface well with flour and roll out the dough to about 2mm thickness. Use a 3 inch (approx) pastry cutter to cut out as many discs as you can fit (save the off cuts to roll out again to make even more)…

Brush the discs with beaten egg and spoon a small amount of your chosen filling into the middle…

You’ll work out the optimum amount of filling through trial and error but try to avoid overfilling. A burst pierogi is a failed pierogi!

Pick the circle of pastry up and fold in half, pinching gently around the edge as if you were making a mini cornish pasty…

Place each perfect pierogi on a clingfilm lined baking tray but be careful not to let them touch each other, they have a nasty habit of sticking together before they’re cooked.

To cook them, bring a pan of salted water to the boil. Drop a few pierogi in at a time and wait for them to float to the surface, then simmer for 4-5 minutes…

Remove them gently with a slatted spoon. If you’re eating them straight away, have a hot frying pan at the ready, pop in a knob of butter and fry the pierogi for a few minutes on each side until they go a nice crispy golden brown…

Once you’ve boiled them you can leave them to cool and keep them for a couple of days in the fridge or pop them in the freezer to use another day. When you want to eat them just repeat the process of putting them in some simmering water until they float and fry in butter as above.

Enjoy!

Leave a comment

Filed under Uncategorized