Tag Archives: recipe

Coffee and walnut biscotti…

I’m a repeat biscotti offender (evidence here). However, I seem to be unable, or should I say unwilling, to make the same flavour more than once. So this time I pandered to my coffee infatuation and based on this recipe, made delicious coffee and walnut biscotti…

They have chocolate chips running through them and the inclusion of cinnamon and cloves adds a really good spicy twist that compliments the coffee perfectly.

To make them you need…

260g plain flour

200g granulated sugar

1/2 tsp bicarbonate of soda

1/2 tsp baking powder

1/2 tsp salt

1/2 tsp cinnamon

1/4 tsp ground cloves

60ml espresso or strong coffee, cooled

1 tbsp milk

1 egg

1 tsp vanilla extract

85g chocolate chips

100g walnuts

Preheat your oven to 180 degrees.

Whisk the cooled coffee, milk, egg and vanilla extract together in a bowl.

In another bowl or in an electric mixer, if you’re lucky enough to have one, mix together the flour, sugar, bicarbonate of soda, baking powder, salt and spices until combined.

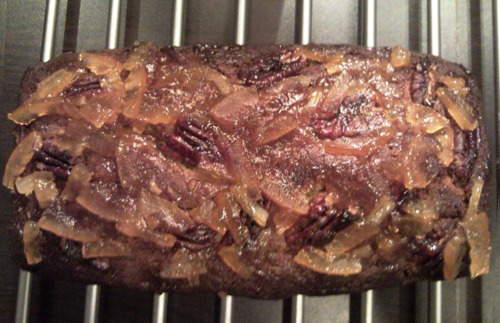
Gradually add the liquids to the dry ingredients and beat until a dough forms. Add the chopped nuts and chocolate chips halfway through. Bring the dough together with your hands. You will need to coat your hands with flour as the next bit could get a bit messy…divide the dough in half and on a lightly floured surface roll each half into a log shape about 10 inches long, 2 inches wide and about 1inch high. Put them on a baking sheet, lined with greaseproof paper. Make sure there’s space in between them (about 3 inches) as they will spread a bit during baking.

Put in the oven and bake for about 35 minutes or until firm to the touch. Remove from the oven and leave them to cool for about 10 minutes…

Turn the oven down to 150 degrees.

Put the biscotti logs on a chopping board and using a sharp knife, cut them diagonally into 3/4 inch slices like so…

(there may be crumbs…perfect opportunity for a first taste test!)

Lie the individual slices on their side on the baking sheet and put back in the oven for 5 minutes. Turn them over and bake for a final 5 minutes…

Remove them from the oven and transfer them to a wire rack to cool completely. Once cool, they’ll store really well in an airtight container.

I have a word of warning for the impatient amongst you…do not underestimate how hot a chocolate chip straight out of the oven can be! heed my words…leave these to cool before attempting a taste! but then…enjoy!

Leave a comment

Filed under Uncategorized

What to do with a fridge full of cream cheese…

Is it me, or does Philidelphia always seems to be on offer at the supermarket? I’m not a huge fan but for some reason I feel compelled to grab a bargain and end up stockpiling it! So here, my friends, is what to do if, like me, you happen to find yourselves with excessive amounts of cream cheese in your fridge…make cheesecake brownies!…

I asked my old mate google what to do and from his list of suggestions I was drawn to this recipe on the Joy of Baking site.

For the brownie layer you need…

113g unsalted butter, cut into pieces

115g dark chocolate, coarsely chopped

250g granulated white sugar

1 tsp vanilla extract

2 eggs

65g plain flour

1/4 tsp salt

Preheat the oven to 160 degrees and line a tin with greaseproof paper. I used my standard brownie tin, which measures approximately 20 x 30cm.

Put the butter and chocolate in a bowl over a saucepan of simmering water and melt. Remove it from the heat and stir in the sugar and vanilla extract. Add the eggs, one at a time, beating well after each addition. Add the flour and salt and beat well with a wooden spoon, until the batter is smooth and glossy (it should take about one minute). Spread the brownie batter into the prepared tin but keep back about 1/2 cup of the mixture for later.

Now for the cream cheese layer…

227g cream cheese, at room temperature

65g granulated white sugar

1 tsp vanilla extract

1 egg

Use a handheld mixer to blend the cream cheese until smooth. Then add the sugar, vanilla, and egg and blitz again until creamy and totally lump free! Pour/ spread the cream cheese layer as evenly as possible over the brownie layer. Lastly, spoon small dollops of the reserved brownie mix over the top of the cream cheese filling and with your kitchen implement of choice swirl the two batters to make a pretty pattern without mixing them too much (if that makes sense).

Bake for about 25 minutes or until the brownies start to come away from the sides of the tin and the edges are just beginning to brown. Remove from the oven and leave to cool on a wire rack. Put the brownie’s in the fridge for a few hours, this will make them extra fudgy and firm enough to cut. Once chilled, remove the brownies from the pan and cut into squares with a sharp knife. They were so deliciously gooey that cutting them neatly was not an easy task. If I’m honest I don’t think they’ll last long enough to be judged on neatness but if you’re a perfectionist like me I recommend that you arm yourself with a glass of hot water for dipping the knife in and a cloth to wipe it on between cuts. Store the finished brownies in the fridge, where they’ll keep really well for several days.

I preferred them straight from the fridge but felt I should test them at a variety of temperatures so that I could vouch for the fact that they are totally scrummy in all conditions and…at any time of day 🙂

Leave a comment

Filed under Uncategorized

My liquid caramac love affair…

I regularly get peruse the Domestic Sluttery blog, they lure me in with the most amazing dresses, furniture, food and nic nacs to die for. In January I spotted this recipe for Millionaire’s mud cake, printed it off and stashed it away, waiting for an excuse to make it (not that I ususally need one!). The perfect occassion presented itself in the form of my housemate’s 30th birthday and I set about creating the wondrous mud cake smothered in a caramac-like caramel and white chocolate ganache frosting! I made an 8 inch cake and piled it high with a variety of chocolates and even if I do say so myself…it looked bloody gorgeous!

However, in the excitement of the moment and due to the fact that we were running around getting the house ready before guests and the birthday boy arrived, I completely forgot to take any photo’s. Apart from a blowing out of candles action shot…

So…the next day I decided to do it all over again but this time I poured the cake batter into cupcake cases and baked them for 20 minutes, making gorgeous individual Millionaire’s mud cake cupcakes (rolls off the tongue eh ;))…

The cake was so moist and rich and I absolutely fell in love with the white chocolate caramel frosting…I ate so much of it that I’m surprised there was enough left to actually ice the cakes…mmm…liquid caramac…

Leave a comment

Filed under Uncategorized

Fool proof pancakes…

By now you’re probably aware that this Tuesday (8 March) is Shrove Tuesday or more importantly in my opinion…Pancake Day! Despite the fact that I absolutely love pancakes, I only have them once a year; eating them on any other day just doesn’t feel right!

Historically Pancake Day was a chance to use up all of the rich foods in your larder the day before the fasting period of Lent commenced on Ash Wednesday. Pancakes themselves are pretty healthy, which gives you the perfect excuse to go as mad, bad and naughty with your choice of toppings as you like!

The recipe I use is one that my Mum passed onto me years ago from her Be-Ro cookbook – it’s fool/fail proof so why not give it a go…

You will need…

100g plain flour

A pinch of salt

1 egg

300ml semi skimmed milk

Mix the flour and salt together in a bowl. Make a well in the middle and break in the egg. Stir together, gradually adding the milk until everything is incorporated. Beat it well with a whisk and some good old fashioned elbow grease until your batter is lump free. It should be the consistency of single cream. Set it aside to rest for half an hour or so.

To cook…put a small amount of oil in a non stick frying pan, over a medium heat. Ladle in enough batter to thinly cover the base of the pan, tipping it to and fro to ensure that you’ve got an even coverage. Leave to cook for a couple of minutes and then check the underside.

When it’s golden brown, loosen the edges, brace yourself and… flip the pancake over, or if you’re risk averse (read ‘boring’) use a fish slice to turn it over. Cook the other side for a few seconds and then turn out onto a plate and eat straight away with your topping of choice.

There are no hard and fast rules on pancake topping although I personally don’t think you can go wrong with a good sprinkling of sugar and a squeeze of fresh lemon juice. But how about mixing it up a bit with some fresh orange and sugar, lashings of nutella, golden, maple or any type of yummy syrup, dulce de leche and ice cream, stewed apples, a drizzle of honey and some nuts for a bit of crunch or bananas flambéed in sugar and rum and served with cream.

Or why not take advantage of this season’s forced rhubarb and cook up some roast spiced rhubarb a la Nigel Slater with a dollop of crème fraiche? (http://www.guardian.co.uk/lifeandstyle/2010/feb/07/nigel-slater-rhubarb-mackerel-recipes)

 Pancake Day comes just once a year…so why not be adventurous!


Leave a comment

Filed under Uncategorized

Carrot, orange and sultana cupcakes…

Over the last couple of years my work colleagues have been spoilt rotten, sampling the fruits of my baking labours. Now with only a couple of weeks until I leave my job to move onto pastures new I’m making sure I bake them lots of goodies to cement my lasting legacy. Last week’s contribution to their calorie intake came in the form of delicious carrot, orange and sultana cupcakes…

To make these beauts you need to preheat the oven to 160 degrees and line a 12 hole cupcake tin with paper cases in preparation.

You need…

1 cup plain flour

1tsp bicarbonate of soda

1/4 tsp salt

1tsp ground cinnamon

2 eggs

3/4 cup sugar

2/3 cup corn oil (or similar)

1tsp vanilla extract

2tsp orange zest

1 cup grated carrot (approx 2 carrots)

3/4 cup sultanas

1/2 cup chopped walnuts

Sift the flour, bicarbonate of soda, salt and cinnamon into a bowl. In a separate bowl beat the eggs with the sugar until smooth and thick. I’m lucky enough to have a KitchenAid mixer but a handheld mixer or some good old fashioned elbow grease would do the trick!

Slowly mix in the oil, vanilla and orange zest until blended. Then stir in the flour mixture that you sifted earlier and finally add the carrot, sultanas and walnuts.

Fill each muffin case to about 1/2 an inch below the rim and bake for about 25 minutes until a skewer inserted in the middle comes out clean.

Leave to cool for 10 minutes and then remove them from the tin to cool completely ready for icing.

For the frosting you’ll need…

1/2 cup unsalted butter, at room temperature

170g cream cheese, at room temperature

1tsp vanilla extract

3 cups icing sugar

2tsp orange zest

12 walnut halves

Now, in the past I’ve tried using light cream cheese for cupcake frosting and…it just doesn’t work! It tastes fine but the consistency always ends up being too runny. So, I finally decided to stop fighting it and opted for full fat and I can vouch for the fact that it really does make a difference. In for a penny in for a pound eh?!

Use an electric mixer to beat together the butter, cream cheese and vanilla until smooth. Add the icing sugar and beat until smooth again, then rack up the speed and beat for another minute of so until the frosting is nice and light.

Stir in the orange zest and either use a piping bag with a large nozzle attachment to swirl the frosting onto each cupcake or, as I did, use a small palette knife or spatula to spread a good dollop of frosting onto the cakes, topping them off with a walnut half…et voila…

If you don’t hoover them all instantly, you can keep them in the fridge and they’ll last for a couple of days.

They were exceptionally moist and light and the delicate orange flavoured frosting was literally the icing on the cake 🙂 …

Leave a comment

Filed under Uncategorized

Proper Polish plum dumplings (aka knedle)…

I went home to Cambridge last weekend and on arrival was greeted with the sight of my sister cooking up a batch of knedle. Now…knedle are proper Polish fayre…don’t be put off when I tell you that they’re actually plum dumplings made by wrapping whole plums in a dough made from pureed potato! They are then boiled, fried in butter and rolled in sugar! It may all sound a bit unconventional but as I’ve said before…don’t knock it until you’ve tried it…

It was a real treat to have the knedle made for me as I’m usually the one in the kitchen. But I got my sister to give me a blow by blow account of how they were made…and it goes a little something like this…

You need…

1kg potatoes

1.5 cups plain flour

1 tbsp potato flour (I’m reliably informed that you can buy this in Holland and Barrett)

1 egg

1 tbsp butter

salt

680g plums (approx)

extra butter for frying

sugar to sprinkle

sour cream to serve (optional)

Rinse the plums, cut them in half, remove the stones and pat them dry.

Peel, boil and drain the potatoes. Add a knob of butter and mash really well. If you’re lucky enough to have a potato ricer…use it!

Leave the mashed potato to cool slightly and then add the egg, salt, sifted flour (both varieties). Quickly knead into a smooth dough. Divide the dough into pieces, you will need a blob of dough per plum. Take each blob and pat it between floured hands. Take 2 halves of plum, reassemble it into a whole and wrap it in the dough to form a ball shape like this…

Knedle aren’t usually this big but the only ripe plums we could find at this time of year were huge yellow ones, which meant our dumplings were monsters!

Bring some salted water to the boil in a big saucepan and gently drop a few dumplings in at a time. When they rise to the surface remove them using a slotted spoon and leave them to drain.

Now…you could eat them at this point, drizzled with melted butter and sprinkled with sugar but we took it a step further just as my Polish Granny used to do.

Melt some butter in a frying pan and gently brown the dumplings on all sides…

When they have taken on a gorgeous colour, roll them in caster sugar…

Finally, serve them while they’re still warm with a generous dollop of soured cream…

Leave a comment

Filed under Uncategorized

Sticky marmalade tealoaf…

I’ve developed an all encompassing addiction for my homemade Seville Orange marmalade…slathered on hot buttered toast, it can quell even the worst of hangovers and brighten the rainiest of days. But stock levels are dwindling and I’ve had to ration my last couple of jars very carefully. However, the other day, having promised a friend that I would bake for them, I decided to throw caution to the wind and use the last jar in an attempt to make a double whammy of homemade goodness…

sticky marmalade tealoaf…

I was a bit worried that I had overcooked it, but despite my apprehension at the slightly darker colour of the cake…it turned out to be delicious! The chunky marmalade not only added texture to the cake along with the pecans but also made the most amazing sticky glaze to top it off perfectly!

Here’s the recipe…

140g marmalade

175g butter, softened

175g light muscovado sugar

3 eggs, beaten

225g self raising flour

1/2 tsp baking powder

2 tsp ground ginger

1 tsp mixed spice

100g packet pecan halves

Preheat the oven to 180 degrees. Grease and line a 2lb loaf tin (or if you’re jammy like me, you’ll have a silicone loaf tin!).

Save about 1 tbsp of the marmalade in a small pan for later.

Put the rest of the marmalade and the other ingredients, except the pecans into a bowl and mix together for a couple of minutes until smooth and light. At this stage you can stir in three quarters of the pecans.

Pour the batter into the tin and smooth the top. Sprinkle the remaining pecans over and bake in the oven for 1 – 1 1/4 hours. You’ll need to cover the tin loosely with foil after about 35-40 minutes of cooking otherwise it will burn. After an hour (or just before), take the cake out and insert a skewer into its middle. If it comes out clean…it’s ready! If not pop it back in for a few more minutes and check again.

Once you’re happy that it’s cooked, remove it from the tin and leave to cool on a wire rack for a while.

Gently heat up the marmalade that you set aside earlier, this is going to provide a gorgeous sticky glaze for your loaf. Once the marmalade is liquid and smooth, spread it over the warm cake and there you have it…

Leave a comment

Filed under Uncategorized

Fitzbillies…gone but not forgotten

This post is a tribute to the legend that is Fitzbillies, a Cambridge institution that had, up until a couple of weeks ago been producing the most amazing trademark chelsea buns for 90 years! Sadly they were forced to close as ‘a result of the very difficult economic times’. I was born and bred in Cambridge and am absolutely gutted to see the demise of such an iconic, independent business!

I’ve never made my own chelsea buns, but inspired by sentimentality I decided to give them a go. They most definitely weren’t up to the sticky, gooey, standard of the Fitzbillies original but…they were darn tasty!…

They’re actually pretty simple to make but you do need to have a bit of time on your hands as there’s quite a lot of setting aside for resting and rising involved…the perfect occupation for a chilled out Sunday afternoon.

To make about 15 chelsea buns you will need…

540g strong white flour (plus a little bit extra for dusting)

1tsp salt

1 packet of easy-blend-yeast

1/2 pint milk

60g unsalted butter (plus a bit extra for greasing the baking tray)

1 egg, lightly beaten

Sift the flour and salt into a large bowl. This makes the finished buns lighter.

Make a well in the flour and add the packet of yeast.

Slowly warm the milk and butter in a pan until all of the butter has melted. Then add it to the flour mixture. Partially mix together and then add the beaten egg before continuing to mix until it forms a soft dough.

Get stuck in and knead it for about 5 minutes until the dough is smooth and elastic.

Cover the bowl with clingfilm, or put it in a plastic bag and place it somewhere warm like an airing cupboard, until the dough has doubled in size. I don’t have an airing cupbard so I used a trick that I learned from watching Lorraine Pascale on Baking Made Easy. She turned the oven on to preheat and sat the bowl on a tall stall right next to it, which provided enough warmth to encourage the dough to rise. Be warned it might take about an hour.

But as if by magic, mine turned from this…

into this…

Whilst you’re waiting for your dough to rise you can grease a 13 by 9inch (ish) baking tray with a little bit of butter and prepare your filling by mixing 270g dried fruit (I used a mixture of sultanas and raisins but you can also use currants and/or mixed peel if you like) with 120g dark brown soft sugar in a bowl.

Remove the risen dough from the bowl and knock it back with your fist to expel the air until it’s back to its original size.

Sprinkle your kitchen surface or a board with flour and roll the dough out into a rectangle approximately 15 by 20 inches.

Brush the surface with 120g melted butter and sprinkle the dried fruit and sugar combo evenly over the entire surface.

Now, comes the slightly tricky bit if you’re baking solo…you need to roll the dough up from the long side, in the style of a swiss roll. Don’t worry if it doesn’t look too neat to start off with, I managed to get mine back on track after a pretty rocky start!

Once you’ve rolled it into a giant sausage, cut it into about 15 pieces and arrange them evenly in the greased baking tray. Leave a little bit of space between each bun…

Cover the tray with more clingfilm and put it back in a warm place for about half an hour, by which time, they should double in size again…

While they are rising, heat the oven to 200 degrees.

Now bake them for 25 minutes or until they’re golden on top.

While they’re baking, you need to prepare the piece de resistance, the bit that makes a chelsea bun, a proper chelsea bun…the glaze!

Dissolve 2tbsp caster sugar in 1tbsp milk, over a low heat. Then bring it to the boil and simmer for 2 minutes. Don’t do this bit too early, like I did, as you’ll get left with a congealed mess. It only takes a few minutes to prepare so wait until the buns are on the verge of being ready.

Remove the glorious buns from the oven and brush them with the glaze. Carefully take them out of the tin and transfer them onto a wire rack to cool. This is no mean feat but apparently it’s very important so that they don’t become soggy on the bottom.

As soon as they’re cool enough, break them apart…and tuck in!

Leave a comment

Filed under Uncategorized

I wanna be a trillionaire…so freaking bad…

WARNING…only complete chocoholics should venture further…

Ladies and Gentlemen, let me introduce you to the latest addition to my baking repertoire…trillionaire’s tart…

or as I like to think of it…millionaire’s shortbread on steroids.

Rich buttery chocolate shortbread, topped with a layer of creamy, smooth, chocolate caramel, finished off with a marbled coating of milk and dark chocolate…not one for the faint hearted!

Here’s how to make it for yourselves…

Line a 20cm x 30cm tray with baking paper and preheat the oven to 180 degrees.

Layer 1 – chocolate shortbread

160g unsalted butter

100g caster sugar

100g plain flour

25g cocoa

140g ground almonds

Cream the butter and sugar together until pale, sift in the flour and cocoa and stir in the ground almonds. Press into the tin and bake for 20 minutes. Set aside to cool.

Layer 2 – gooey chocolate caramel

175g unsalted butter

175g light brown soft sugar

450g sweetened condensed milk

4tbsp golden syrup

50g dark chocolate

and the magic ingredient…1/2tsp sea salt

Put all of the above ingredients into a pan and heat gently, stirring until all of the sugar has dissolved. Bring it to the boil and then simmer briskly for about 8 minutes until it has thickened. Pour over the shortbread base, make sure it’s spread evenly and leave for about 1 hour until it is completely cold.

Layer 3 – marbled chocolate topping

100g dark chocolate

200g milk chocolate

Melt both chocolate’s separately in bowls over simmering water. Pour the milk chocolate over the caramel and then drizzle over the dark chocolate and use your implement of choice to swirl them together making a pretty pattern.

Leave it to cool, cut into squares and there you have it…the most delicious slice of chocolatey goodness that’ll have you registering with your nearest chocoholics anonymous (or more realistically…weight watchers)!…

2 Comments

Filed under Uncategorized

Blueberry muffins for those blue days!

Yesterday I was languishing at home, feeling ill and sorry for myself. I decided there was only one thing for it…I needed to call upon the healing powers of baking! I ventured to the fridge with trepidation but was pleasantly surprised to find that, amongst other random items, I had butter, a carton of buttermilk, some eggs and a punnet of big fat juicy blueberries…they literally jumped out at me and begged me to make them into blueberry buttermilk muffins, which is exactly what I did…

How could something that gorgeous looking not make even the most self pitying, sadsack feel better?…

They were instantly rewarding and ever so easy to make. So if you ever find you’re having a blue day and want the quick fix of a bit of simple baking all you’ll need is…

400g plain flour

175g caster sugar

1tbsp baking powder

finely grated rind of 1 lemon

1/2tsp salt

284ml carton buttermilk

2 eggs, beaten

85g butter, melted

250g fresh or frozen blueberries or other summer fruits

Preheat the oven to 200 degrees and line a 12 hole muffin tin with paper cases.

Put the flour, sugar, baking powder, lemon rind and salt in a big bowl.

In a separate bowl mix together the buttermilk, eggs and butter.

Make a well in the dry ingredients, pour in the wet ingredients and stir until (only just) combined. It’s important not to overmix it, for once you don’t have to be precious about leaving the batter lumpy. Lightly fold in the blueberries trying not to squash them.

Fill each of the paper cases generously and pop them in the oven for about 25 minutes. At this point they should have risen and be a delicious golden brown…

Leave them to cool in the tin for a few minutes before tuning out onto a wire rack to cool completely.

Go on…make your day!

Leave a comment

Filed under Uncategorized