Tag Archives: recipe

Birthday baking

I am now the very proud owner of a gorgeous, sexy, empire red, shiny new KitchenAid Artisan Stand Mixer. I have been dying to get my hands on this little beauty for a while so when I finally unwrapped it on my birthday it was only a matter of minutes before I’d donned my apron and was whipping up a batch of raspberry cheesecake brownies from the Hummingbird Bakery Cookbook. I chose this particular recipe, not only because it looks amazing but because it has 3 layers, for which the recipe tells you to use a ‘freestanding electric mixer’ woop!

But don’t despair…you can still make it by using a handheld mixer or even good old fashioned elbow grease!

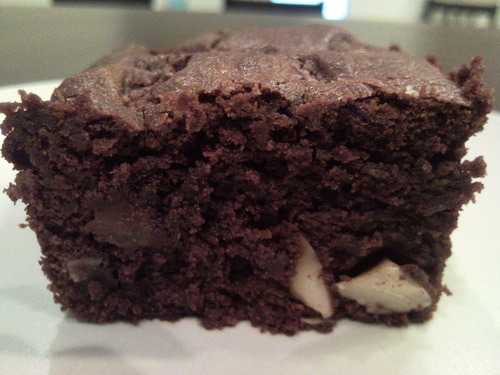
I’ve written out the recipe below if you fancy giving it a go…how can you resist when faced with brownie porn like this??…

Raspberry cheesecake brownie – 

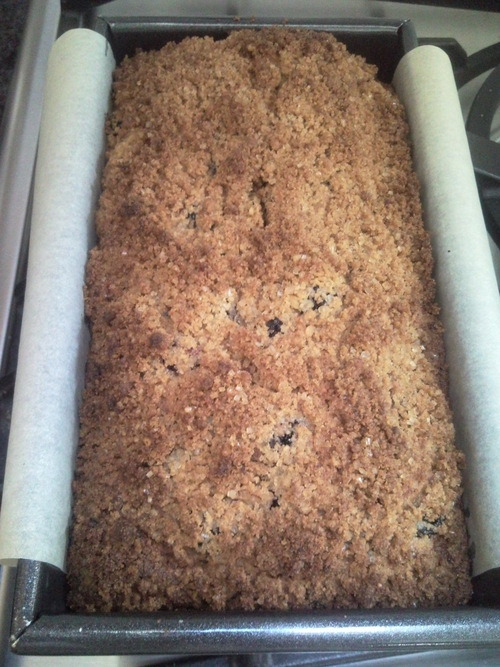
Preheat the oven to 170 degrees and prepare a 33 x 23 x 5cm baking tray by lining it with baking parchment.

brownie layer – 

200g dark chocolate roughly chopped

200g unsalted butter

250g icing sugar

3 eggs

110g plain flour

Melt the chocolate in a bowl over a saucepan of simmering water until smooth. Mix the butter and sugar (in my case I used the paddle attachment and my spanky new KitchenAid…sorry to brag!) until well incorporated. Add the eggs one at a time and mix well before adding the flour. The turn up the speed on your mixer and beat away until the mixture is smooth. Finally pour in the melted chocolate , give it a final mix and pour into the baking tray. Smooth this layer with a palette knife and put aside for the time being.

cheesecake layer – 

400g cream cheese

150g icing sugar

1/2 tsp vanilla extract

2 eggs

Mix the cream cheese, sugar and vanilla extract together slowly until smooth and thick. Add one egg at a time. The mixture should be smooth and creamy, at which point you can increase the speed of mixing to make it light and fluffy but be careful not to overmix as it will split. Spoon the cheesecake mixture on top of the brownie layer, smooth it out and put in the oven for 30-40 minutes until the cheesecake layer is firm and golden around the edges. Leave to cool completely and then cover and put in the fridge for 2 hours or overnight if possible.

cream topping – 

300ml whipping cream

100g icing sugar

150g raspberries plus extra to decorate

Whisk up the cream, sugar and raspberries until firm but not stiff. 

Remove the brownie from the tin, spread the raspberry cream mixture on  and decorate with the extra raspberries.

Then put the kettle on, make a cuppa, sit back, relax and savour….

Leave a comment

Filed under Uncategorized

Foraging in the fens

I decided this weekend that it was high time I escaped London and visited my friends and family back in Cambridge. There’s something about going home to the flat, open fenlands that gives me an enormous sense of wellbeing and calm. However by Sunday I was having severe baking withdrawal symptoms so I started trawling my Mums vast cookery book collection and came across a book called ‘101 cakes and bakes’. I discovered a recipe for blackberry and apple loaf, which I have also found on the Good Food website here.

Now is the season for both blackberries…

and apples…

so I had the perfect chance to make the most of the fruits growing on my doorstep and in my parents garden. After a yummy homemade Sunday lunch me and my brother went foraging for blackberries straight from the hedgerow…it felt extremely wholesome and we managed to collect a bumper crop…

enough for my cake, with some left over to put in the freezer for another day.

Here’s the recipe I followed for blackberry and apple loaf –

250g self raising flour

175g butter

175g light muscovado sugar

1/2tsp cinnamon

2 rounded tbsp demerara sugar

1 small eating apple, quartered (not cored or peeled)

2 large eggs, beaten

1 orange, finely grated zest

1tsp baking powder

225g blackberries

Preheat the oven to 180 degrees. Grease and line a (1.7 litre) loaf tin.

This recipe uses a bit of a different method…you rub the flour, butter and muscovado sugar together with your fingertips to make fine crumbs. Measure out 5 tbsp of this mixture in a separate bowl, mix with the demerara sugar and cinnamon and set aside to use later as the topping for the loaf.

Coarsely grate the apple and mix with the eggs and the zest. 

Stir the baking powder into the rubbed-in mixture in the large bowl and then quickly stir in the egg mixture until incorporated but be careful not to overmix.

Carefully fold in 3/4 of the berries trying not to break them up. Spoon the mixture into the tin and level it out. Scatter the remaining berries on top and sprinkle over the topping mix.

Bake for 50 minutes, remove from the oven and cover it loosely with tin foil to stop it browning too much. Then return it to the oven for 20-30 minutes until firm. Insert a sharp knife or skewer, if it comes out clean the cake is ready!

Leave in the tin for 30 minutes…

 before turning it out onto a wire rack to cool…

then slice and revel in it’s beauty…

The recipe says that it will keep for up to 2 days in a tin, however it’s so delicious and moreish, that if you’re anything like me and my family, it probably won’t last longer than a couple of hours let alone days.

The blackberries are tangy, the cake is rich and extremely moist and the topping adds a gorgeous crunchy texture…

Leave a comment

Filed under Uncategorized

WARNING! not for the faint hearted…

I’m a sucker for chocolate, along with the majority of the females of the species but I’m also an absolute salt fiend and have been known to snack on slices of cheese topped with freshly ground sea salt…mmmm! So imagine my delight when, on reading The Sweetest Kitchen, a blog I follow, I learnt that Lindt have introduced a bar of dark chocolate with a touch of sea salt!

Jamieanne, the blog author also shared a recipe that she had found for Salted Chocolate Shortbread. I couldn’t get it out of my head and spent the rest of the afternoon at work daydreaming about salty chocolate creations. I decided to bite the bullet, did a pit stop at Waitrose, who stock the aforementioned magic chocolate and headed home for some baking.

Surprisingly I don’t think I’ve ever made shortbread before. There’s a first time for everything and without further ado here is the recipe I used to make my salted chocolate shortbread…

300g unsalted butter

220g caster sugar

375g plain flour

5tbsp good-quality cocoa powder

1/4tsp bicarbonate of soda

Preheat the oven to 180 degrees. Grease and line a 18 x 28cm shallow baking tray.

Beat the butter and sugar in a bowl with a handheld whisk until pale. Sift in the flour, cocoa powder and soda and beat slowly until just combined. Spread into the tray and smooth over. I used my hands to push it into the corners but was careful not to compact it or overwork it too much. I then put my shortbread straight in the oven, only realising once I’d done so that I was meant to have pricked it all over with a fork and chilled it for 15 minutes beforehand…oops!

It needs baking for 25 minutes or until firm to the touch. Then should be left to cool completely.

I can report that my shortbread was pretty darn perfect and didn’t seem to suffer from my forgetfulness. Maybe next time I’ll make sure I do the pricking and chilling and try to spot the difference.

While your shortbread is cooling you can crack on with the salty ganache topping…

2 x 100g bars of Lindt touch of salt, finely chopped

2/3 cup of heavy whipping cream

2 tbsp unsalted butter, room temperature, cut into small cubes

sea salt flakes

Place the chopped chocolate in a bowl. Heat the cream until it’s just about to simmer (do not boil), then pour it over the chocolate and leave for about a minute. Stir it until smooth and all of the chocolate has melted. Add the butter and stir until combined. 

Put the bowl in the fridge for approx 20-30 minutes to set. Every 5-10 minutes get it out and give it a good stir/whisk. Once the ganache is of spreadable consistency smooth it over the cooled shortbread with a spatula and then let it set for 30 minutes until it’s firm to the touch. Cut the shortbread into squares, wiping the knife clean after every cut to keep the ganache crumb free and vice versa. Sprinkle a few sea salt flakes onto each square and hey presto you have the most amazing chocolatey, salty delicacies…

Now, brace yourselves and behold, what I believe are the best baking porn photo’s I’ve taken to date…

I was really happy with how these turned out…they were delicious and were a huge hit with my colleagues! The flavours really balanced themselves out, the overriding taste was definitely the chocolate but the salt worked to cut through the sweetness and helped ensure that they weren’t too sickly and the sudden salty hit that you get from the flakes of sea salt was a pure delight.

Don’t knock it until you’ve tried it…and I highly recommend that you do!


Leave a comment

Filed under Uncategorized

rain rain go away…

It may be the end of August but in my book Summer shouldn’t be over yet and yet the rain just won’t go away! It’s been a miserable day, I trudged home under a miniscule, ineffectual umbrella with soggy pump-clad feet, which is enough to put anyone in a bad mood. But…I decided all should not be lost…I cracked open a beer, donned some warm socks and my apron, put on my new Andreya Triana album and started comfort baking…surely the answer to everything!?

In my eyes Chocolate Brownie’s are the ultimate choice in comfort baking. I decided to laugh in the face of danger and mix it up a bit though…so these weren’t any normal bog standard brownies…they were chocolate brownies with pears and brazil nuts. I had the saying…’if something ain’t broke don’t fix it’ ringing in my ears but I decided not to err on the side of caution and take a risk. I used 70% dark chocolate and ripe, ready to eat conference pears…

I only cooked the brownies for 30 minutes and they were cooked to perfection…

You couldn’t exactly taste the pear but it definitely added to the texture and sweetness. They are exceedingly moist and have that sticky brownie-like consistency without being cloying. 

Check this out for a bit of food porn to chase the wet weather blues away…

Leave a comment

Filed under Uncategorized

A mammoth batch of melting moments

Last Friday my friend Hannah enlisted my help in baking enough biscuits to feed 40-50 people, for a charity afternoon tea that her Mum was hosting at the weekend. To me, a Friday night spent baking is near on perfect…made even more so when combined with a gin and tonic or two!

Han sourced a recipe for melting moments. I’d never made them before and was slightly confused by the fact that they didn’t have any eggs in them…just butter, sugar, flour and strangely enough…cornflour, which apparently is what makes them ‘melt in your mouth’. They were very easy to make but were very very fragile (note to self…not a good idea to make melting moments whilst drinking gin and tonic). We were a bit generous when forming our balls and I think we could have made them a bit smaller but other than that they turned out perfectly…

The idea is to let them cool slightly but not entirely before covering them in icing sugar, this ensures they are coated well…

The biscuits are shortbread-like but a lot less dense and they literally melt away as soon as they are in your mouth…it’s magic!

We baked 4 batches in the end with Top Gun on the telly in the background…the perfect accompaniment!

Leave a comment

Filed under Uncategorized

Essential festival packing….

Tomorrow morning I’m heading off to the Big Chill Festival. Despite this being my 5th year of attendance, the annual ritual of packing far too much and jaunting off to a field in the middle of rural Herefordshire still hasn’t lost it’s excitement! Earlier today I wrote a Facebook status about the fact that I’ve stocked up with 2 litres of booze, tonic water, limes, bin bags, wet wipes, wellies, a selection of hats and a big fur coat and asking…’what more could you want for the perfect festival experience!?’ the answer, of course…home baked goodies to sustain the (possibly) soggy campers!

The logistics of carrying these baked goods was at the forefront of my mind so cupcakes or anything too fragile were instantly ruled out. I decided the flatter the cake the better and googled ‘tray bakes’. Waitrose came up trumps with what I have now deemed to be perfect festival fodder…

Plum tray bake with a cheesecake ripple

200g tub cream cheese

1tsp vanilla extract

3tbsp caster sugar

4 medium eggs

175g unsalted butter, softened

175g dark muscovado sugar

200g self-raising flour

400g ripe plums, halved, stoned and roughly chopped

Preheat the oven to 180 degrees. Grease and line a 28cm x 18cm  shallow baking tray making sure that the paper comes up higher than the rim of the tin.

Beat the cream cheese, vanilla extract, caster sugar and one of the eggs together until smooth.

In another bowl beat together the remaining eggs, butter, muscovado sugar and flour.

Now comes the assembling part…spread half the creamed flour mixture onto the base of the lined tray, dollop half the cream cheese mixture on top and swirl it around to create a marbled effect. Scatter over half of the plums. Then spread over the remaining flour mixture and dot with the last of the cream cheese mixture before topping with the plums.

Bake for 40/45 minutes until risen and firm to the touch. Leave to cool in the tin before cutting into approx 10 pieces (I need mine to stretch to 14 so that I don’t leave any of my friends wanting!).

This photo makes it look a bit overcooked but inside it looks just right…

The smell coming from the oven as it was baking was mouthwateringly divine…if this cake lasts until tomorrow without being devoured by either me or my housemates it’ll be a pure miracle!

And then there’s the issue of whether it can survive being packed into tupperware to endure a long car journey and whether it’ll still be edible after being dragged along on a trolley on the trek from the car park to the campsite! By which point I will probably be hungry enough to eat my own arm and will most definitely have earned myself a slice!

1 Comment

Filed under Uncategorized

The Dolly Parton of cupcakes

These are the Dolly Parton of cupcakes, artificially coloured, unashamedly vulgar and absolutely irresistible. (Xanthe Clay, Telegraph, 23 May 2008)

A while back, my work colleague, Dawn, asked me to make her some cakes to share with our whole department in celebration of her 50th birthday. I’m sure it’s obvious how much I love baking, but I love it even more when there’s a special occasion involved. I’ve been gagging to test out the red velvet cupcake recipe in the Hummingbird Bakery cookbook for ages and as the red velvet cake originates from the USA (where Dawn hails from) I thought this was the perfect opportunity. I also, only yesterday, had my first taste of an original Hummingbird red velvet cake and not just any old red velvet cake, this one measured a whopping 13 x 18 inches and had been lovingly ordered, personalised and transported from London to the middle of rural Huntingdonshire for my friend Marks 30th birthday! Once I’d tasted it I realised there was definitely no going back…

The recipe calls for 20ml of Dr Oetker red food colouring but I couldn’t get hold of any so I used concentrated food colouring gel, bought from Lakeland and it seems to have worked just as well…

I wasn’t having much luck today and discovered that my local supermarket doesn’t stock buttermilk either so I decided to substitute it with creme fraiche.

I made 4 batches of cupcakes, 46 cupcakes in total, one of which had to be tested by my resident guinea pig…Sal, my housemate, who actually went so far as to say that he thought they were the best cupcakes I’d made…ever! Praise indeed!

They truly are the Dolly Parton of the cupcake world and I love them! I just hope Dawn does too. That’s if I can get them to work in one piece…it’s going to be no mean feat single-handedly transporting 45 cupcakes through London on public transport…eek!


Leave a comment

Filed under Uncategorized

Blueberry, peach and almond cake

A weekend with my family usually revolves around eating delicious food and lots of it! We had quite a few birthdays to celebrate so we rolled them all into one and had a huge family barbecue, to which everyone contributed something. It felt like we ended up cooking up and eating a whole farmyard’s worth of meat…I was in heaven! Once everyone had recovered from the meat fest and tucked into desert of fresh fruit brulee (a family favourite) and Granny’s summer pudding we entered the cake round…my domain. We still had a lot of the saffron clotted cream cake left but I also made Nigel Slaters ‘cake for midsummer’, which I’d ripped out of the Observer Food Monthly magazine in June and stashed in my book of ‘must bake’ recipe clippings. It goes a little something like this…

175g butter

175g golden caster sugar

200g ripe peaches

2 large eggs

175g self raising flour

100g ground almonds

1 tsp grated orange zest

a few drops of vanilla extract

150g blueberries

Line a 20cm (8 inch) cake tin with greaseproof paper and preheat the oven to 170 degrees.

Halve, stone and chop the peaches and set aside for later.

Cream the butter and sugar until pale and fluffy. I used a handheld whisk. Beat the eggs in one at a time. If it looks like it’s starting to curdle add a small amount of flour.

Mix the flour with the ground almonds and fold into the butter mixture in a few batches. Add the orange zest and vanilla and last but not least, the blueberries and peaches.

Tip the mixture into the prepared tin and Nigel says to bake it for 1 hour 10 minutes. I like my cakes extra moist so after 1 hour I tested it by inserting a sharp knife into the middle of the cake and as it came out relatively clean I decided it had had long enough in the oven.

On Nigel’s advice I sprinkled the cake batter with golden caster sugar before putting it in the oven, creating a gorgeous sweet, crunchy crust on the moist, fruity almond cake.

This cake was super easy, light, tasty and I never thought I would use this word to describe a cake but it was…well…refreshing!

Leave a comment

Filed under Uncategorized

A magnificent golden tower of a cake

Last Saturday during my weekly perusal of the Guardian magazine I discovered a whole section entitled ‘50 top cooks top recipes’ it didn’t disappoint…there were so many great sounding recipes that I plan to work my way through. But with my brothers 21st birthday looming I was specifically on the look out for a new and exciting cake recipe…the article didn’t let me down and I found Dan Lepard’s saffron clotted cream cake recipe. I’d never heard of Dan Lepard before but having had a quick swizz of his website and blog I will definitely be trying out a few more of his recipes. He describes this cake as ‘A magnificent tower of light saffron buttercake, rich with clotted cream, layered with lemon curd and topped with clotted cream frosting and more swirls of lemon. The perfect summer party cake’ I didn’t need any more convincing and I was also totally intrigued with the concept of baking with saffron and clotted cream…both firsts for me!

It was a really really hot day, which had a bit of a bad effect on my icing, together with the fact that I got a bit over excited when estimating 2-3 tbsp of water straight from the kettle oops! It tasted great but it sure didn’t look like Dan’s.

I also got a a bit creative with the lemon swirls and edible gold glitter…it was my brothers 21st birthday cake after all!

The cake turned out perfectly moist and although not everyone could taste the saffron, I personally think it added beautifully fragrant undertones to the light but rich sponge which was then cut through by the tangy layers of lemon curd.

Next time I make this cake I’d like to use my own lemon curd and I personally think if you’re using shop bought that you need more than one jar and…don’t add too much boiling water to your icing 🙂

Leave a comment

Filed under Uncategorized

A strawberry & vanilla pavlova that’d make Delia proud

After my yummy J+A lunch I headed over to Hyde Park where I had a date with the Kings of Leon, oh…and a few thousand fellow Londoners :). There had been group emails flying around all morning sorting out arrangements for the afternoon. My friend Rory said that he would be bringing champagne and pavlova for us to enjoy before the gig. I didn’t quite realise how serious Rory was…he didn’t just bring a standard shop bought pavlova and a supermarket bottle of champagne or cava. Instead we were spoilt rotten with…

Once we were settled on our blankets in the sun supping our champagne like a load of old lush’s, Rory delved into his bag and produced all of the lovingly homemade components needed to construct Delia’s strawberry and vanilla pavlova

He uncovered the meringue, made fresh that morning, spooned on the gorgeously vanilla infused mascarpone/fromage frais mixture, poured over pureed strawberries, topped with fresh strawberry halves and last but not least (I was most impressed by his attention to detail) dusted the pavlova with icing sugar….and, as I’m sure you’ll agree, it looked better than Delia’s…

and it tasted divine! Four of us managed to polish off the whole desert in a matter of minutes. It’s amazing what can be achieved with the aid of some tupperware, imagination, ‘can do’ attitude and a little bit of help and advice from Delia!

Leave a comment

Filed under Uncategorized